Why Pattern Making Decides the Bag
Pattern making is the step where a drawing becomes a product. Every later decision — how the bag stands, how the closure aligns, how much material it consumes — is already determined by the shapes cut from paper.
The bridge between design and production
A sketch shows what a bag should look like; a pattern shows how to make it. The pattern translates the idea into flat pieces whose edges, when joined, produce the intended three-dimensional form.
This translation is where most design intent is won or lost. A beautiful sketch with a weak pattern produces a bag that sags, twists or closes badly, and no amount of careful sewing recovers it.
Why the flat pieces are counter-intuitive
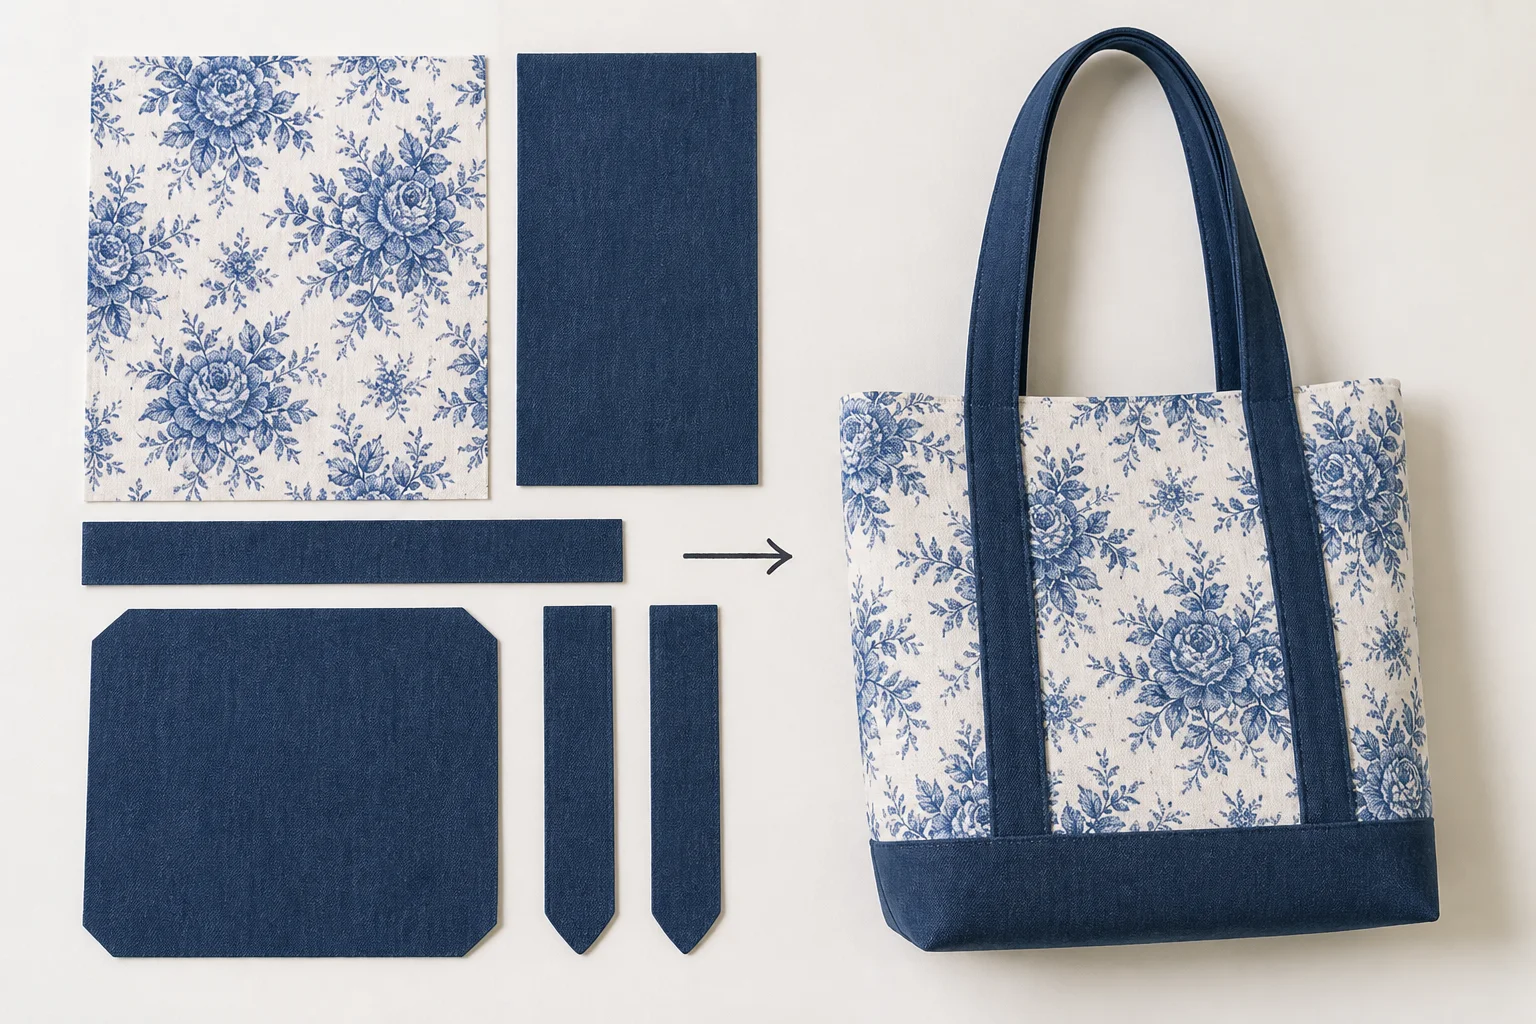
A bag’s parts do not look like the bag. A gusset is a long strip, a base may be a single curved panel and a front pocket is rarely the shape it appears to be. Pattern making is the discipline of reasoning about the flat input that produces the curved output.
That is why pattern makers work with proportions, curves and three-dimensional thinking rather than with the finished image. The pattern is a set of instructions, not a picture.
What good pattern making delivers
| Outcome | How the pattern delivers it |
|---|---|
| Correct shape when filled | Panels and gussets sized for the intended volume |
| Straight closures | Matched top edge lengths on both sides |
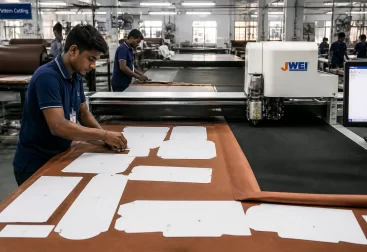
| Efficient material use | Nesting layout that limits waste |
| Consistent production | Notches, marks and seam allowances |
| Repeatable sizes | Graded pattern set per size |
Each row is a production risk removed before cutting begins, and each is cheaper to solve in paper than in leather. That economics is the whole case for investing in pattern making early.
The Anatomy of a Bag Pattern
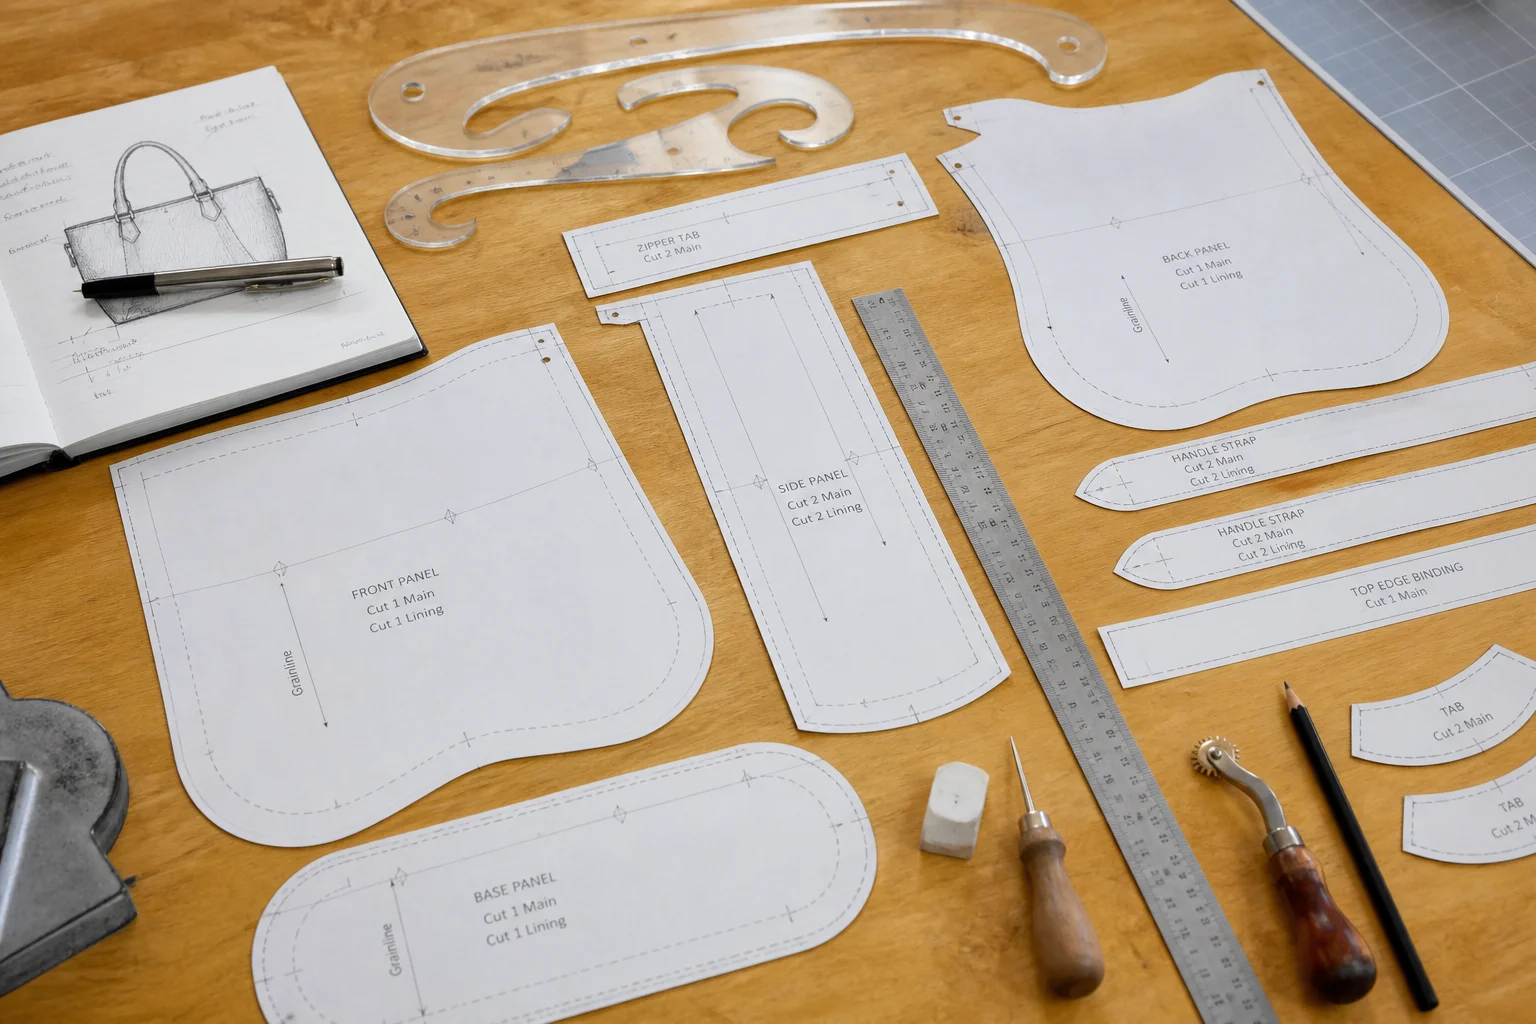
A bag pattern set is a group of pieces rather than a single template. Understanding what each piece does makes the assembly instructions readable and the sample review far more productive.
Main body pieces
The front and back panels are the largest pieces and set the bag’s silhouette. They may be mirror images, or deliberately different where one side carries a pocket or a design feature.
On many bags these panels also carry the shaping: a curved top edge, a tapered base or a slight flare. Those curves are what make a bag read as designed rather than as a box.
Gussets, bases and side panels
The gusset is the strip that joins the front and back and gives the bag its depth. Its length must match the perimeter it attaches to, and its width sets how much the bag holds.
Where a base panel exists, it joins the gusset at the corners and is the piece most sensitive to measurement error. A base that is a few millimetres out produces a bag that rocks or twists when filled.
Facing, flaps and pocket pieces
Facings finish the opening and stiffen the top edge; flaps close the bag and must align with the front panel; pockets are built as separate assemblies and attached at marked positions.
Every piece carries its own seam allowances and interface needs. The pattern set is a system, and a change to one piece usually propagates to its neighbours.
Interfacing and reinforcement patterns
Interfacing pieces are cut slightly smaller than the panels they support and are often overlooked by new buyers. Their patterns define the bag’s structure as much as the visible leather does.
A pattern set without interfacing pieces hands the structure decision to the factory, which then chooses its default and the bag’s hand-feel drifts from the design.
From Sketch to Flat Pattern
Drafting a pattern from a sketch follows a repeatable sequence: establish the dimensions, build the flat shapes, then test them in a cheap material before cutting the real thing.
Establishing the dimensions
Start with the finished measurements: length, height, depth and strap drop, plus the volume the bag must hold. These numbers come from the design brief and from what the target user actually carries.
Convert each finished measurement to its flat equivalent by adding seam allowances and accounting for the thickness of the material and its stretch under load. Material thickness is small per seam but adds up across a gusset.
Drafting the panels
Draft the front and back from the finished dimensions, then derive the gusset length from the actual perimeter of the panels it joins. Measure the curve with a tape, not with a straight ruler, or the gusset will be short.
Curve the top edge and taper the base to control the silhouette, and check the symmetry by folding the draft in half rather than by measuring both sides separately.
Testing in paper or muslin
Before cutting PU leather, build the pattern in paper or cheap calico and tape it together. The mock-up reveals the real shape in minutes, at almost no cost, and shows which measurements need adjustment.
This step is the most valuable habit in pattern making. A paper mock-up catches a short gusset or a twisted base before any material is committed, which is exactly when the correction is free.
Pattern makers rarely trust a new draft. They build it, look at it, and change it — because a paper mock-up costs minutes and a mis-cut batch costs a production run.
From Flat Pattern to 3D Shape
A flat pattern becomes a bag when the pieces are joined, and the shape that emerges depends on how the joins are angled and how the volume is distributed. Three-dimensional thinking is what separates a competent pattern from a box.
How seams create volume
A seam does more than join two pieces: it creates an angle. Two panels joined along their edges with a gusset between them open into a three-dimensional form, and the gusset’s width sets the angle.
Widen the gusset and the bag becomes deeper and more rectangular; narrow it and the bag flattens. The same front and back panels therefore produce very different bags depending on one measurement.
Controlling silhouette with panel shape
The silhouette is controlled by the shape of the panels: a taper at the base produces a trapezoid, a flare produces a bucket, and a curved top produces a softer, more organic profile.
Work at the finished shape rather than the flat shape. Hold the mock-up filled and look at its profile, because a bag looks different full than empty and the full state is how it will be seen.
Where bags go wrong in three dimensions
| Symptom | Pattern cause | Correction |
|---|---|---|
| Base bulges or rocks | Base panel too large | Reduce base length and depth |
| Sides bow outward | Gusset too wide for the panel | Narrow the gusset |
| Top edge waves | Panel top too long | Re-draft the top curve |
| Bag collapses when full | Interfacing omitted or too light | Add structure to the pattern set |
| Corners pucker | Corner radius too tight | Increase the radius or notch more |
The table is a diagnostic: each symptom points to a specific pattern piece, and each correction is a paper change rather than a production change.
Checking the assembled form
Judge the mock-up when it is filled with the weight the bag is designed to carry. Empty bags hide structural weaknesses; loaded bags reveal them immediately, which is why the test must include a load.
Then check the details in three dimensions: the closure alignment, the flap drop, the pocket access and the strap angle. Each looks correct on the flat drawing and can misbehave on the assembled bag.
Darts, Gussets and Shaping
Shaping techniques turn flat panels into curved surfaces. Three are used constantly in bags, and knowing their trade-offs makes the difference between a crisp and an awkward result.
Darts for controlled curvature
A dart removes a wedge of material and pulls the panel into a curve. It is the standard way to shape a rounded corner or a domed top and produces a clean, deliberate line.
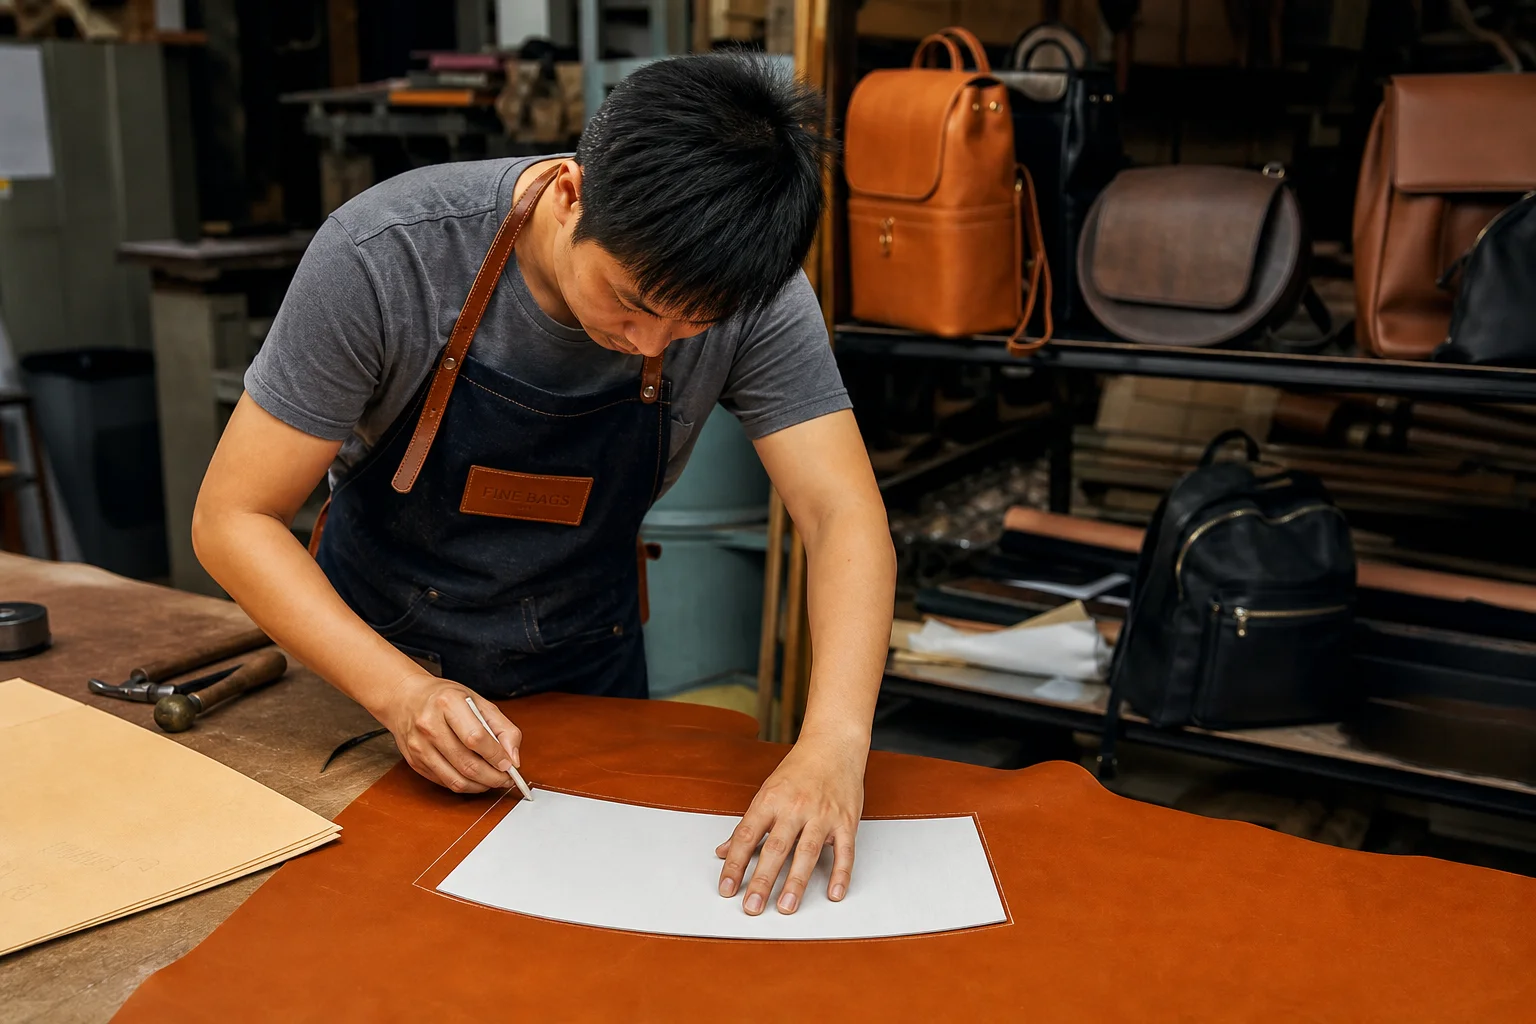
Darts must be marked precisely on the pattern, because a dart sewn a few millimetres off changes the curve visibly. Transfer the markings to the leather with a notched or chalked reference rather than an estimate.
Gussets for depth
The gusset carries the bag’s depth and its corners. Its length follows the perimeter of the panels it joins, and its corners are usually radiused to match the base.
Construction choices on a gusset — one piece folded at the base, or a separate base panel joined at both ends — change both the look and the labour. The pattern must specify which route is intended.
Pleats, folds and gathering
Pleats and gathers add volume without a gusset, and they are common in softer, more casual designs. They demand accurate marking because the fold lines determine where the volume sits.
On PU leather these techniques are less forgiving than on fabric: folds can crack the surface if the material is stiff or the fold radius is tight, so the pattern should allow a gentler turn.
Choosing the technique
Structured bags favour darts and flat panels; softer bags favour gussets and gathers. The choice is aesthetic but it is also technical, because each technique imposes its own minimum radii and material requirements.
Decide early and write the technique into the pattern notes. A pattern that leaves the shaping method open produces a sample that answers a different question.
Seam Allowance and Notches
Seam allowance and notches are the pattern’s technical language. They tell the sewer where the pieces align and how much material to leave, and their absence creates inconsistency across operators.
Seam allowance by construction
| Construction | Typical allowance | Note |
|---|---|---|
| Main panel seams | 8–10 mm | Allows trimming and binding |
| Gusset joins | 8–10 mm | Consistent with main seams |
| Top edge / facing | 10 mm | Accommodates folding |
| Zipper opening | 10–12 mm | Depends on zip tape width |
| Pocket edges | 6–8 mm | Smaller for neatness |
Allowances must match the way the bag is actually assembled. A 10 mm allowance on a seam that is then trimmed to 5 mm wastes material and adds a step; stating the final allowance is more useful than stating the cut allowance.
Notches, marks and balance points
Notches mark where pieces join: the centre of a panel, the start of a curve, the position of a pocket. They are the pattern’s assembly instructions and the reason two operators produce the same bag.
Add balance points at every critical junction and never rely on the sewer to centre pieces by eye. Centring by eye produces a bag that is subtly asymmetric, which is exactly the defect customers notice.
Marking methods for PU leather
Standard tailor’s chalk can leave a residue on PU and marking pens can stain. Use notches at the seam allowance, awl marks in hidden areas or removable tape, and specify the method in the pattern notes.
Whatever the method, it must not survive into the finished product. Marking that shows through a light-coloured material is a defect that cannot be repaired after assembly.
Pattern Making for PU Leather and Lining
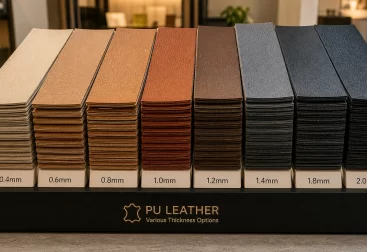
PU leather behaves differently from fabric, and the pattern must account for how the material cuts, folds and stretches. Ignoring those differences produces samples that look right in paper and wrong in production.
Why PU leather needs its own allowances
PU leather has a knit or woven backing, which means it stretches in one direction more than the other and does not recover like woven fabric. Panels must be cut with the stretch direction consistent across the bag.
Its surface is also less forgiving: needle holes are permanent, folds can crack at tight radii and pressing can mark the finish. The pattern should therefore reduce the number of folds and chose radii the material can take.
Lining patterns and the bag inside
The lining is patterned from the body pieces with small adjustments: slightly reduced dimensions so it sits inside without pulling, plus its own seam allowances and pocket assemblies.
Lining patterns also determine the interior layout — slip pockets, zip pockets, dividers — and that layout is what buyers and end users judge the bag by. It deserves the same attention as the exterior.
Interfacing, reinforcement and edge treatment
Interfacing patterns should be listed for every panel that needs structure, cut smaller than the panel so it does not bulk the seam. Reinforcement patterns cover the load areas: strap anchors, handle attachments and base corners.
Edge treatment also belongs in the pattern notes: whether edges are folded and stitched, bound, painted or left raw. Each choice changes the effective seam allowance and the amount of material consumed.
Testing material behaviour before production
Test the chosen material before cutting a full set: fold it at the intended radius, stitch and unpick a sample seam, and check how it behaves under the pressure of a loaded bag. Some defects only appear in production quantities.
The test is quick and it protects the most expensive stage. Material that cracks at a corner radius should be replaced or the pattern adjusted; either way, the decision belongs before cutting.
Grading and Size Runs
Grading is the process of producing a pattern set for each size in a range. It is not simply scaling: proportions change, details must stay functional and hardware must be re-selected as sizes move.
Grading rules for bags
Scale the primary dimensions according to the size interval, but adapt the details: strap width, hardware size, zip length and pocket proportions each have their own sensible range.
Hardware rarely scales gracefully. A clasp that looks right on a small bag is undersized on the largest size, so the pattern set should specify a different part rather than a stretched version of the same one.
What changes between sizes
| Element | Typical grading behaviour |
|---|---|
| Height and width | Scale by the size interval |
| Depth | Scale less than height |
| Strap length | Scale minimally; check drop |
| Pocket proportions | Re-proportion, not scale |
| Hardware size | Re-select by load, not scale |
| Seam allowance | Usually constant |
The pattern set for each size must be tested in mock-up, at least at the extremes of the range. The largest size is where structure shows strain and the smallest is where openings become too tight to use.
Keeping the range consistent
Graded patterns must preserve the family resemblance: the same top curve, the same gusset ratio, the same hardware language. Otherwise the range looks like several unrelated bags that happen to share a name.
Keep a master pattern and a documented grading rule so a new size can be added later without re-drafting the whole family.
Tools and time
Grading by hand is accurate but slow; CAD grading automates the arithmetic and keeps every size versioned. Whichever route you take, the output is a checked mock-up per size, not just numbers on a screen.
Budget for sampling the extremes of the range rather than every size, and inspect the largest size first, where the structural risks concentrate.
Pattern Making with Your Factory
Most brands work on pattern making with their manufacturing partner rather than alone. The working relationship decides how quickly the pattern converges on the intended product.
Who owns and keeps the patterns
Establish ownership in writing before the work begins. The pattern is a production asset: whoever holds it can reproduce the product, so the agreement should state who owns the pattern, where it is stored and how it is released.
Many brands commission the pattern from the factory and keep a copy of the digital files or a reference set of physical patterns. That copy is the insurance against a change of supplier.
What to send the pattern maker
Send the design with the finished dimensions, the intended material, the hardware and the construction preferences, plus reference images of the silhouette you want. Ambiguity in the brief becomes a guess in the pattern.
If you already have a bag you like, sending the physical sample is more useful than any drawing, because the pattern maker can measure the actual proportions and shaping.
Reviewing the pattern sample
Review the first pattern sample filled and loaded, checking the profile, the closure alignment, the base stability and the strap angle. Note every deviation with a measurement, not an impression.
Expect two rounds before the pattern is settled. The first corrects the shape, the second refines the details, and both are cheaper than discovering the problem after cutting production material.
Documenting the approved pattern
Record the approved pattern version, the material and interfacing used, and photographs of the mock-up and finished sample. This documentation is what allows the pattern to be reproduced faithfully next season or by another factory.
A pattern without documentation is a single point of failure; a documented pattern is a transferable asset.
Pattern making is where design meets physics. The pattern maker’s job is to make the idea buildable, and the buyer’s job is to give them enough information to do it without guessing.
Pattern Corrections and Fit Fixes
Patterns are almost never right the first time. Knowing how to read a fault and which piece to change is what turns a disappointing sample into an approved product in two rounds instead of five.
Reading a fault back to a pattern piece
Every visible fault traces to a piece: a wave at the top edge to the panel curve, a bulge at the base to the gusset or base panel, a strained closure to mismatched opening lengths. Diagnose before adjusting.
Measure the suspected piece against the pattern and against the mock-up. Pattern problems reproduce consistently, while assembly problems vary from piece to piece — the consistency of the fault tells you which one you have.
Adjusting without breaking the assembly
Change one piece at a time and re-check its neighbours. Shortening a gusset changes the perimeter it must match, so the panels it joins may need adjustment too, and a single uncoordinated change can create a second fault.
Record each change with the new measurement and the reason. A correction log turns the pattern’s history into knowledge that survives staffing changes and prevents re-introducing a fixed fault.
When to re-draft rather than patch
If a pattern accumulates many small corrections, or if the silhouette itself is wrong rather than a dimension, re-draft that section from the finished measurements instead of patching. A clean draft is usually faster than a stack of corrections.
Keep the earlier version until the new pattern is proved. A pattern file with two versions and one approved mock-up is a healthy workflow; one with a single patched file and no reference is a risk.
Working inside the material’s limits
Some faults cannot be designed away. A stiff PU leather will crack at a tight fold no matter how the pattern is drawn, and a heavy bag will distort a thin base panel regardless of seam allowance.
When a fault resists correction, change the material, the interfacing or the construction rather than the pattern. Recognising that boundary saves rounds of pattern revision that cannot succeed.
FAQ
What is bag pattern making?
It is the process of turning a bag design into flat pattern pieces that, when cut and joined, produce the intended three-dimensional bag. It covers drafting, shaping, seam allowances, interfacing and grading.
Why does a gusset measure longer than the panel edge?
Because the gusset follows a curved perimeter and is drafted from the measured edge, not from the straight dimension. Measuring the curve with a tape rather than a ruler prevents a short gusset and a puckered seam.
Do I need a mock-up before cutting PU leather?
Yes. A paper or calico mock-up costs minutes and reveals the true shape, catching short gussets, twisted bases and awkward proportions before any material is committed to a production run.
How much seam allowance should a bag pattern have?
Most main seams and gusset joins use 8–10 mm, top edges about 10 mm and pockets 6–8 mm, with zipper openings sized to the tape. What matters most is that every piece uses the allowance consistently.
Can I just scale a pattern to make other sizes?
No. Proportions, pocket shapes, hardware sizes and strap lengths all change behaviour across a size range, so sizes must be graded with rules and re-proved in mock-up, especially at the extremes.
Who owns the pattern if the factory makes it?
Whoever the agreement says. Put ownership, storage location and release conditions in writing before work starts, and keep a copy of the digital files or a reference set of physical patterns.
Why does my bag twist or rock when filled?
Usually a base panel or gusset dimension error, or insufficient interfacing. Check the base against the pattern, then test the bag filled with its intended load — the defect normally appears only under weight.
How long does pattern development take?
For a straightforward bag, expect a draft, a mock-up and one or two sample rounds over a few weeks. Complex constructions with multiple compartments and hardware take longer.
Does pattern making affect material cost?
Significantly. Panel shapes and the nesting layout determine how much material each bag consumes, so a pattern revised for efficient layout can reduce material use without changing the design.
What should I send to a pattern maker?
Finished dimensions, material and hardware specifications, construction preferences, reference images of the silhouette, and a physical sample if you have one. The clearer the brief, the fewer the guessing rounds.
How do I know which pattern piece caused a fault?
Measure the suspect piece against the pattern and compare the mock-up with several production pieces. Pattern faults repeat identically, while assembly faults vary between pieces, so consistency identifies the cause.
When should a pattern be re-drafted instead of patched?
Re-draft when the silhouette itself is wrong or when corrections have accumulated into a pile of patches. A clean draft from the finished measurements is usually faster and easier to document than more patching.
Next Steps: Build the Pattern Before the Product
Pattern making decides how a bag stands, closes, holds and wears — and it does so in paper, long before material is cut. Draft from finished dimensions, test in mock-up, specify seam allowances and notches, then prove the range with graded sizes.
A factory that develops patterns in-house and documents them makes this process a single conversation instead of a series of guesses. That is the standard our factory works to — send us your design and we will take it from sketch to a production-ready pattern set.
Developing a new bag shape? Contact our team at info@gionar.com for pattern development, sampling and production support.
Related reading: our custom bag manufacturing portfolio shows how patterns, materials and construction come together in production.