- What a Tech Pack Is and Why It Decides Your Order
- The Core Sections of a Bag Tech Pack
- Drawing Standards That Make Drawings Useful
- Measurements and Tolerances
- The Bill of Materials
- Construction Details That Prevent Rework
- Hardware, Labels and Packaging
- Building the Tech Pack: Tools and Workflow
- Common Tech Pack Mistakes
- FAQ
What a Tech Pack Is and Why It Decides Your Order
A tech pack is the document set that tells a factory exactly what to make: the drawings, the measurements, the materials, the construction and the finishes. It is the difference between ordering a product and hoping for one.
The document that replaces guesswork
Without a tech pack, a factory works from photos, a sample and conversation. It fills every gap with its own assumptions — and its assumptions are shaped by what is easy and cheap for it, not by what your brand needs.
With a tech pack, each decision is written down once and applied to every sample and every production run. The document becomes the shared reference that survives staff changes, factory changes and season changes.
What happens without one
The symptoms are familiar to anyone who has ordered bags without a tech pack: samples that differ from the brief, quotations that cannot be compared because each factory priced a different product, and arguments about what “the same as last time” means.
Each symptom carries a cost in money and calendar. Rework after a wrong sample, renegotiation after an unclear spec and re-inspection after a silent substitution all trace back to the same missing document.
Who uses it and when
| Stage | Who uses the tech pack | What it decides |
|---|---|---|
| Quotation | Sales and costing team | Material and labour estimate |
| Sampling | Sample room | Pattern, construction, trim |
| Approval | Buyer and factory | What “correct” means |
| Production | Line supervisors and QC | Standards on the floor |
| Inspection | Inspectors or third party | Pass or fail criteria |
The same document serves five audiences. That is why it must be complete rather than elegant: every reader finds the section they need, and no reader is left to interpret.
The Core Sections of a Bag Tech Pack
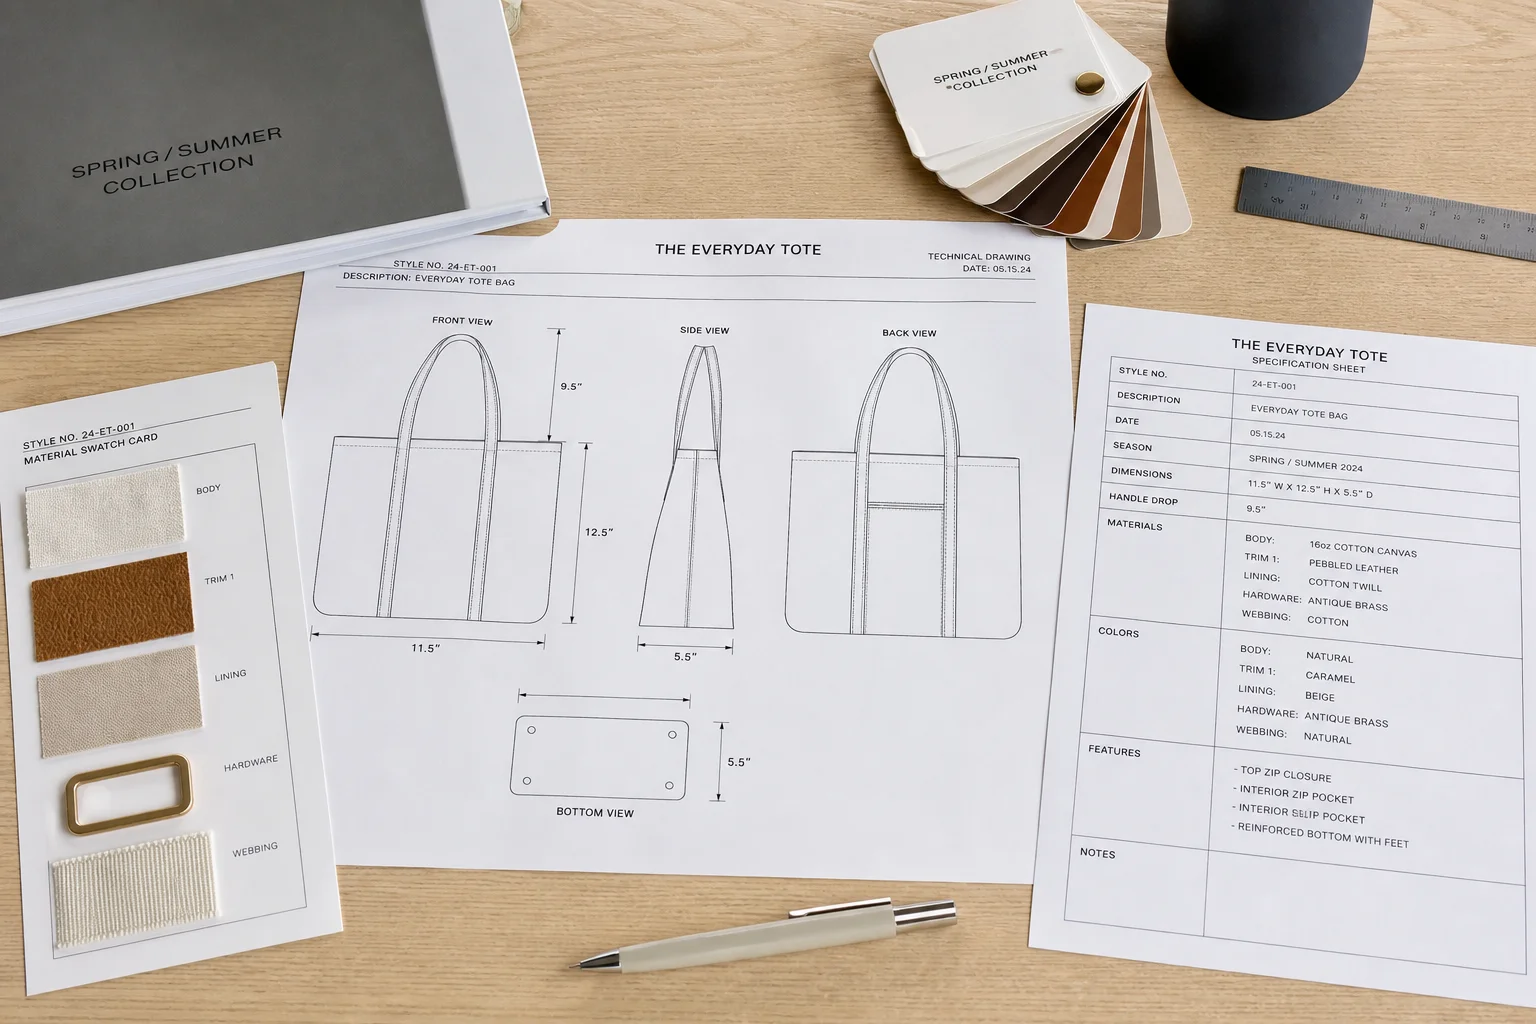
A complete bag tech pack has seven sections, and each answers a specific question the factory would otherwise ask. Skipping a section does not remove the question; it just moves it later, when changing the answer costs more.
Cover sheet and style information
The cover sheet carries the style number and name, the version, the date, the brand contact and the order context. It is the first page anyone opens and the reference that keeps several styles from being confused.
Version control matters more than most brands expect. A simple version number and date on every page prevents the factory from producing to an outdated drawing while the buyer reviews the new one.
Technical drawings
The drawings show the bag from every relevant angle: front, back, side, top, bottom and interior, plus detail views for anything that cannot be read at full scale — a zip pull, a strap junction, a pocket edge.
Each view carries its dimensions, material callouts and construction notes. The drawing is the centre of the tech pack; if it is ambiguous, everything downstream inherits the ambiguity.
The bill of materials
The bill of materials lists every component with its specification, quantity and reference: body material, lining, interlining, hardware, thread, labels and packaging. It is the shopping list the costing team prices and the production team buys from.
A bill of materials with vague lines — “PU leather, black” — produces a quotation with vague assumptions. Specific lines produce comparable quotes and reusable specifications.
Construction and stitching details
This section describes how the bag is built: seam types and allowances, edge finishing, reinforcement placement, topstitch distances and the order of assembly where it matters for the finish.
Construction notes are where inexperienced tech packs are thinnest and where experienced buyers spend their time. A bag’s quality lives in these details, and they are cheap to write down.
Measurements and tolerances
The measurement table lists every critical dimension with its tolerance, from overall length to pocket depth. It converts “about this big” into a number an inspector can verify with a tape.
Tolerances protect both sides: the buyer defines what is acceptable, and the factory is not judged against an unstated ideal. Without them, every measurement dispute is a negotiation.
Hardware and trim specification
Every hardware item gets its own line: type, size, material, finish, brand or grade, position and fixing method. Zippers, snaps, rings, feet, rivets and logo plates all belong here with their references.
Trim specifications also cover the elements that are easy to forget: the drawcord, the piping, the edge paint, the interior label and the woven tag.
Labels and packaging
Labels carry brand and compliance information: the main label, the interior tag, the care instruction and the country of origin marking required by the destination market. Packaging covers the polybag, the hangtag, the carton and the carton marking.
Specifying packaging in the tech pack prevents the most common shipment surprise: the factory packs to its own standard, and the buyer pays for cartons that do not fit the retail or warehouse requirement.
Drawing Standards That Make Drawings Useful
A drawing earns its place when a stranger can build from it without asking a question. That standard is achievable with a handful of conventions applied consistently.
The views a bag needs
Start with the standard orthographic views: front, back, both sides, top, bottom and interior. Add detail views, usually at larger scale, for edges, junctions and hardware positions that would be cluttered at full size.
Most bags also benefit from one annotated photograph or rendering that shows the intended look. Drawings define geometry; the image communicates the target impression, and factories read both.
Dimensioning rules that prevent errors
Dimension every critical distance, and dimension it once. Duplicated or conflicting dimensions force the factory to choose, and its choice is not always the one you intended. Where a scale drawing is used, note the scale, but never rely on it in place of numbers.
Dimension to reference points that exist on the physical bag — seam lines, edges, hardware centres — rather than to imaginary centre lines. An inspector can measure to a seam; it cannot measure to an intention.
Callouts and annotations
Number your callouts and list them in a legend beside the drawing: material, stitch type, thread colour, edge treatment, hardware code. The legend turns a crowded drawing into a readable instruction sheet.
Keep terminology consistent across the pack. If the pocket is a “slip pocket” on page three, it should not become an “open pocket” on page seven — inconsistency reads as two different features.
Scale, format and file discipline
Deliver the pack as a single PDF with pages in order, plus the source files if the factory may need to adjust artwork placement. Vector drawings scale cleanly; low-resolution images do not.
Keep the file size reasonable and the resolution adequate — drawings compressed to unreadable thumbnails cost more in emails than they save in megabytes.
Measurements and Tolerances
Measurements turn a design into something a factory can build and an inspector can check. Tolerances acknowledge that manufacturing varies, while keeping the variation inside limits that do not affect the product.
How to measure a bag consistently
Define the measuring method for each dimension: laid flat or filled, measured across the widest point, seam to seam or edge to edge. Two people measuring the same bag differently produce two different numbers.
Take the measurements from the approved sample rather than the drawing wherever possible. The sample is the physical truth; the drawing is the intention, and the two should be reconciled before production.
Tolerances by part
| Dimension | Typical tolerance | Why |
|---|---|---|
| Overall length and height | ± 5 mm | Material stretch and cutting |
| Depth and gusset | ± 3 mm | Assembly alignment |
| Strap length | ± 10 mm | Cutting and hardware placement |
| Pocket and compartment | ± 3 mm | Panel assembly |
| Hardware position | ± 2 mm | Visual balance |
| Topstitch distance | ± 1 mm | Finish consistency |
These figures are a practical starting range for soft bags, not a universal law. Tighten where the product demands it and loosen where the material makes precision expensive, then state the numbers explicitly.
Measuring the sample and recording the result
Measure the approved sample across every critical dimension and record the numbers as the production standard. Attach photographs of the measuring positions so the factory and the inspector measure the same way.
This step converts a general drawing into a specific, checkable product — and it is the reason inspection reports can be compared to something other than opinion.

The Bill of Materials
The bill of materials is the tech pack’s commercial backbone: it is what the cost is calculated from and what the factory buys against. Its precision determines how comparable quotations are and how controlled production is.
What each line needs
Every line carries the component name, its position in the bag, the specification, the reference or article number, the colour, the quantity per piece and the unit. Include the supplier when one is specified, and note where substitution is permitted.
The quantity per piece is the line most often missing and the one that drives material purchasing. Without it, the factory estimates consumption and the estimate goes into the price.
Specifying materials by reference
Name materials precisely: the base material and its grade, the thickness or weight, the finish and the colour reference. “PU leather 1.2 mm, matte, pebbled, colour ref 19-1106” can be sourced repeatedly; “good quality PU” cannot.
Where a specific supplier or article is required, say so and record the reference. Where equivalent quality is acceptable, define what “equivalent” means — thickness range, test results, appearance — so the substitution is controlled rather than silent.
Substitution rules in writing
State clearly which components may be substituted and under what conditions, and which are locked. Most buyers lock hardware, labels and lining while allowing minor variations in thread or packaging where the difference is invisible.
Require written confirmation for any substitution outside those rules. The clause is short, and it is the difference between a controlled order and a discovery at delivery.
Construction Details That Prevent Rework
Construction notes are where the bag’s quality is actually defined. They describe how the parts become a product, and they are the section that new buyers most often leave too thin.
Seam types, allowances and stitch density
Specify the seam type for each join, the seam allowance in millimetres and the stitch density in stitches per inch. These three numbers decide how the bag holds together and how it looks along its edges.
Where the design needs reinforcement, say where it goes: bar tacks at strap joints, double stitching along load-bearing seams, rivets where stitching alone would carry too much stress.
Edge finishing and interior treatment
Describe how edges are finished — folded, bound, painted, sealed or left raw — and what the interior looks like: lining type, pocket layout, seam treatment and any interior reinforcement panels.
Edge finishing is one of the most visible quality differences between price points. Specifying it explicitly prevents a factory from choosing its default because the note was missing.
Interlining and structure
Bags get their shape from what is inside them: foam, board, non-woven interlining or stiffener. Specify the material, its thickness and placement, because this layer decides whether the bag stands or slumps.
Include the soft/hard balance the design intends — a structured tote and a slouchy hobo use different interlinings, and the same pattern produces very different products depending on this single choice.
Avoiding the usual ambiguity
Common ambiguities worth resolving in writing: which side the topstitch sits on, whether pockets are lined, how the strap attaches, where the logo sits and whether the zip is visible or concealed. Each is a small decision that becomes expensive if it is left to chance.
A tech pack is finished when a competent sample maker could build the bag without asking you a single question. That is the standard worth writing to.
Hardware, Labels and Packaging
Trim is where designs are quietly downgraded, because these are the components the factory buys rather than makes. Writing them precisely into the tech pack is what keeps the delivered bag equal to the approved sample.
The hardware specification in the pack
List every hardware item with its type, size, material, finish, brand or grade and position. Include the fixing method — rivet, screw, stitch or press — and the load each structural piece must carry.
Reference the approved hardware sample photograph in the pack. A picture of the actual part, next to its specification, removes the ambiguity that words alone leave in a cross-language conversation.
Labels, tags and care information
Specify the main label, the interior tag, any woven or printed brand elements and their exact positions. Add the care instruction label and the origin marking required by the destination market, with the wording approved in advance.
Label compliance is a market entry issue rather than a design preference. A missing care label or origin marking can hold a shipment at customs, so the tech pack should carry the wording rather than leaving it to the printer’s template.
Packaging and carton details
Describe the polybag or dust bag, the hangtag and its attachment, the folding method, the carton dimensions, the packing quantity per carton and the carton marking. Include the shipping mark format your warehouse or retailer expects.
Specifying the fold and the packing quantity protects the product’s shape in transit and the retailer’s handling at the other end. It also makes freight calculations comparable between suppliers.
| Tech pack section | Must include | Common omission |
|---|---|---|
| Cover sheet | Style number, version, date | Version control |
| Drawings | All views plus details | Interior view |
| Bill of materials | Spec, reference, quantity | Quantity per piece |
| Construction | Seams, allowance, density | Interlining spec |
| Measurements | Dimensions plus tolerances | Tolerance limits |
| Hardware and trim | Type, size, finish, brand | Substitution rules |
| Labels and packaging | Wording, carton, fold | Care label wording |
Building the Tech Pack: Tools and Workflow
A tech pack is built with ordinary tools and a repeatable process. The habit matters more than the software, and the review before sending matters most of all.
Tools and templates
Spreadsheets handle the bill of materials and the measurement table, and vector or CAD software handles the drawings. A clean template with fixed sections and page numbers saves hours on every style that follows.
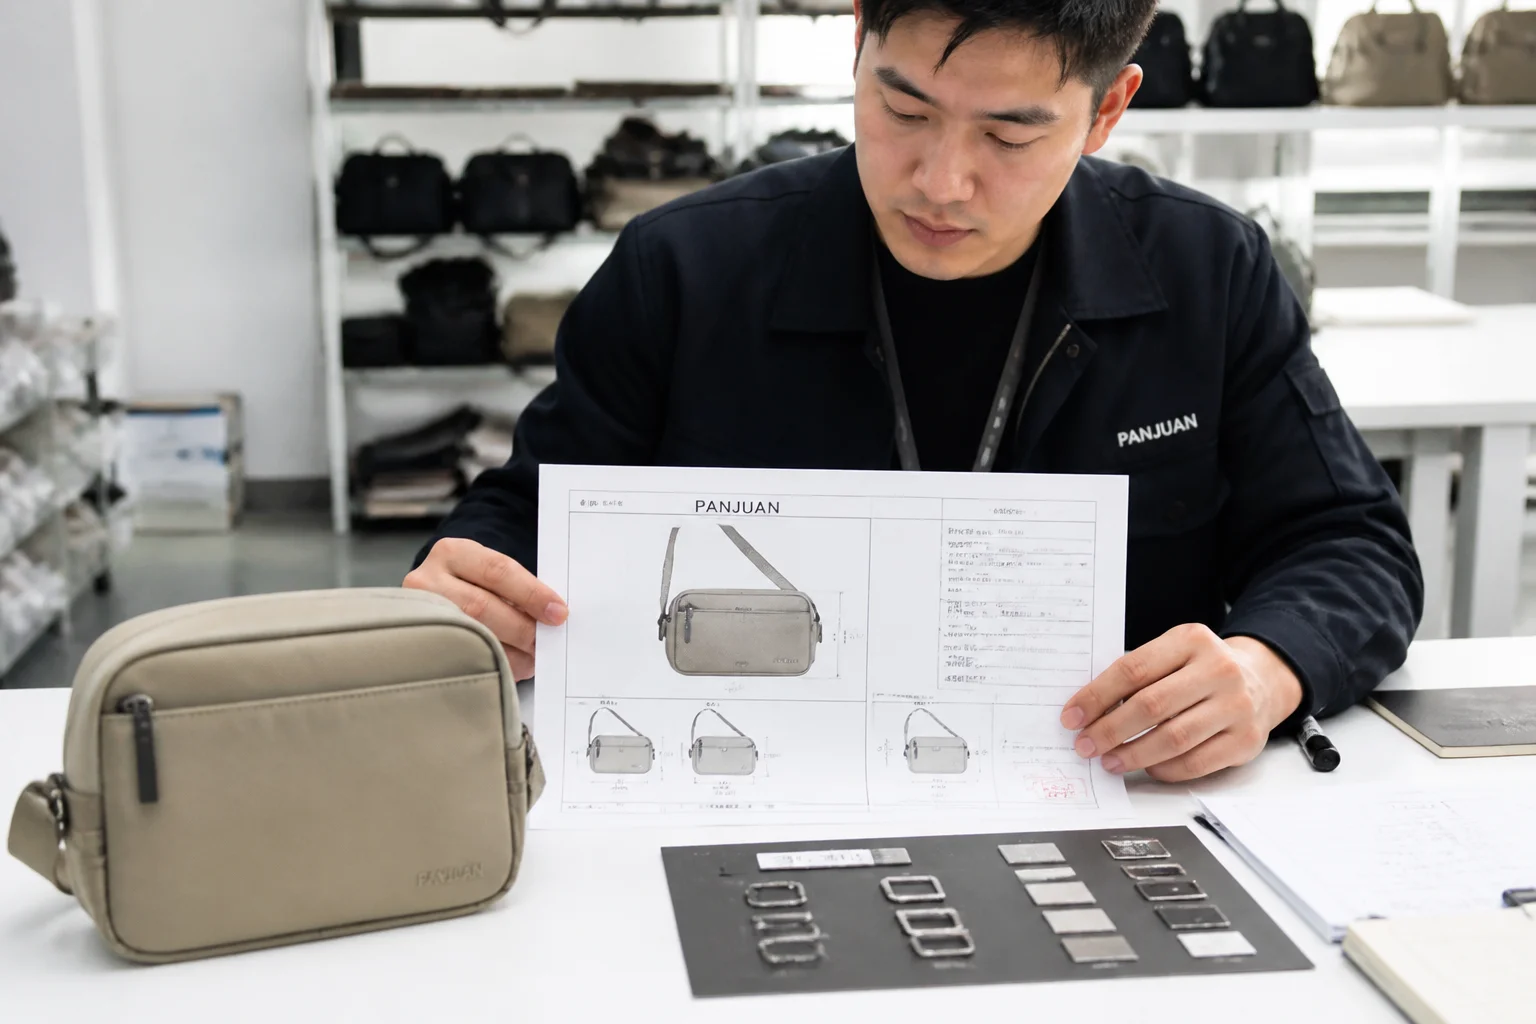
Brands without in-house design capability often start from a factory template or work with a freelance technical designer. Either route works if the output includes every section and is written in the factory’s language.
Working with a designer or the factory
If you work with a designer, brief them on the production reality: available materials, factory capabilities, target cost and target retail price. A beautiful technical drawing for an unmakeable or unaffordable bag helps nobody.
If you work with the factory directly, ask it to comment on the pack before sampling and to flag any material or construction it cannot execute as drawn. Early feedback is free; late feedback is a rework invoice.
The pre-send review checklist
Before sending, check that the drawings match the bill of materials, that every dimension carries a tolerance, that the hardware list matches the drawings, and that the version numbers and dates agree across pages.
Then read it as the factory would: could you quote from this, buy from it and build from it without asking a question? The gaps you find in that reading are the gaps the factory would have filled with assumptions.
Common Tech Pack Mistakes
Tech packs fail in predictable ways, and each mistake has a straightforward correction. Reviewing your pack against this list takes ten minutes and prevents weeks of rework.
Incomplete measurements and missing tolerances
A pack with dimensions but no tolerances invites disputes, because the factory decides what “close enough” means. Add the tolerance column and the measuring method, and the argument disappears.
Vague materials and unspecified hardware
“PU leather, black” and “gold hardware” produce whatever the factory has in stock. Replace both with specification, reference or an approved sample photograph, and lock the substitution rules in writing.
No version control
When three versions of a drawing circulate by email, the factory produces to the one in its own folder. A version number, a date and a single current file remove the entire problem.
The correction is a simple naming convention and one authoritative file per style, shared through a link rather than attachments.
Forgetting the packaging and label sections
Brands often invest heavily in the product sections and leave the carton, the polybag and the care label to chance. These are the details that delay shipments and surprise buyers at the warehouse.
The correction is to treat packaging as part of the product: specify it in the pack, approve it with the sample and inspect it with the shipment.
Drawings that cannot be built from
A pack whose drawings lack callouts, detail views or dimensions forces the sample room to invent solutions. The result is a sample that answers a different question than the one you asked.
The correction is the pre-send reading test: if a sample maker would need a conversation, the drawing is not finished.
Turning the Pack into a Quote and a Sample
A finished tech pack is not the end of the process; it is the input to the next two steps. How you hand it over decides whether the quotation is comparable and the first sample is close.
Sending the pack for quotation
Send the same pack to every factory you are comparing, with the same quantity, the same Incoterm and the same packaging requirement. Only then are the prices measuring the factories rather than the different briefs you gave them.
Ask each factory to quote against the pack line by line rather than as a single figure. The line detail shows where the differences come from — material, labour or overhead — and it shows who read the pack carefully.
Inviting technical feedback
Ask the factory to flag anything it cannot execute as drawn, and to suggest alternatives with their cost and quality consequences. A factory that raises two honest questions is more useful than one that quotes first and discovers problems later.
Record the agreed changes as a new version of the pack. The pack then reflects the product you actually intend to make, and the next quotation starts from an accurate document.
Sampling and closing the loop
When the sample arrives, review it against the pack dimension by dimension, not against memory. Note every deviation with its measurement and decide whether it is a correction or an accepted change.
Then update the pack with any approved change and re-issue it as the production version. A pack that stops at the first sample leaves the production run relying on verbal agreements again.
FAQ
What exactly is a tech pack for bags?
It is the document set that specifies a bag for manufacturing: drawings, bill of materials, construction details, measurements and tolerances, hardware and trim, labels and packaging, all version-controlled and shared as one file.
Can I order bags without a tech pack?
You can, using a sample and photographs, but the factory then fills every gap with its own assumptions. The result is samples that drift from your intent, quotations that cannot be compared and quality defined by the factory rather than you.
How detailed should the measurements be?
Every dimension that affects fit, function or appearance should carry a number and a tolerance, with the measuring method stated. Overall size, depth, strap length, pocket positions and hardware placement cover most of what matters.
Do I need professional drawing software?
No — clean, dimensioned vector drawings matter more than the tool that made them. Many brands start with a factory template plus simple illustrations and upgrade to CAD as their range grows.
How do I stop a factory from substituting materials?
Specify materials by grade, thickness and reference, name the supplier where it matters, and write substitution rules that require your written confirmation. Then compare the production sample and the delivery against the approved reference.
What tolerances are normal for soft bags?
A practical starting range is about ±5 mm on overall dimensions, ±3 mm on depth and pockets, ±10 mm on strap length and ±1 mm on topstitch distance. Adjust to the material and the product’s price point, and state the numbers explicitly.
Should the tech pack include packaging?
Yes. Polybag or dust bag, hangtag, folding method, carton size, quantity per carton, carton marking and the shipping mark all belong in the pack. Packaging omissions are among the most common shipment surprises.
How often should I update the tech pack?
On every change to the product, and always before a new production run. Each update gets a new version number and date, and only the current version is shared with the factory.
Who should write the tech pack?
Either an in-house product developer, a freelance technical designer or the factory’s sample room working from your brief and details. The responsibility for accuracy and completeness stays with the brand.
How long does it take to build one?
A first pack for a simple bag typically takes a few focused days; subsequent styles using the same template are much faster. The investment is repaid on the first order through fewer sample rounds and clearer quotations.
Should I send the same tech pack to several factories?
Yes, with identical quantity, Incoterm and packaging requirements, so the quotations measure the factories rather than the briefs. Ask for line-by-line pricing to see where the differences come from.
What do I do if the sample differs from the tech pack?
Measure the deviation against the pack, decide whether it is a correction or an acceptable change, and record the decision. If you accept it, update the pack to a new version so production follows the right document.
Can a tech pack reduce my sample cost?
It often does. A complete pack lets the sample room build correctly the first time, which reduces the number of sampling rounds, and fewer rounds means less sample cost and a shorter calendar before production.
Next Steps: Turn Your Design into a Buildable Pack
A tech pack converts a design into production: complete sections, dimensioned drawings, tolerances, a precise bill of materials, construction notes and the trim details that are easiest to forget. Built once with discipline, it serves every quotation, sample, production run and inspection that follows.
A factory that reads and comments on tech packs before sampling turns the document into a conversation rather than a gamble. That is the standard our factory works to — send us your design and we will tell you what the pack needs to be production-ready.
Ready to develop a bag from a proper tech pack? Contact our team at info@gionar.com for development, sampling and specification support.
Related reading: our custom bag manufacturing portfolio shows how drawings, materials and construction come together in production.