- Why Construction Follows the Style
- The Common Build Sequence
- Casual and Daypack Construction
- Laptop and Business Backpack Construction
- Travel and Trekking Construction
- School and Kids Backpack Construction
- Back Panels and Carry Systems
- Compartments and Organisation
- Materials and Reinforcement by Style
- Quality Checks Specific to Backpacks
- FAQ
Why Construction Follows the Style
A backpack is not one product. A daypack, a laptop carrier and a trekking pack share a shape, and almost nothing else about how they are built.
Use case drives the build
The load a backpack carries, how long it is carried and what it must protect determine the padding, the back system, the reinforcement and the closure. Those decisions are made before any material is selected.
This is why a specification that says “backpack” tells a factory almost nothing useful. The style and its use case are the specification’s foundation.
The four structural systems
Every backpack is built from four systems: the body and its compartments, the carry system of straps and back panel, the closure and access, and the load-bearing attachment points.
How much engineering each system receives is what separates a 13 dollar daypack from a 200 dollar trekking pack. The difference is not the logo or the fabric alone.
Style and construction priorities
| Style | Priority | Construction focus |
|---|---|---|
| Casual daypack | Appearance and price | Simple body, light padding, basic closure |
| Laptop / business | Protection and organisation | Padded sleeve, structured panels, clean finish |
| Travel | Capacity and access | Large compartments, carry handles, durable base |
| Trekking / hiking | Load transfer and comfort | Framed back, hip belt, adjustable harness |
| School / kids | Durability and safety | Reinforced base, reflective details, light weight |
| Business trolley hybrid | Multi-mode carry | Shoulder straps plus trolley sleeve, rigid back |
| Camera / gear | Protection | Foam inserts, structured walls, padded dividers |
Reading down the construction focus column gives the practical checklist for a new style: those are the areas that must be specified and tested.
What goes wrong when style is ignored
A casual construction applied to a laptop backpack produces a bag that protects nothing. A trekking construction applied to a fashion backpack produces an expensive, overbuilt product that the customer finds bulky.
Both failures come from the same source: the build was chosen before the use case was defined.
The Common Build Sequence
Whatever the style, backpack production follows a similar sequence. Knowing it helps a buyer understand where delays and quality issues occur.
Cutting and preparation
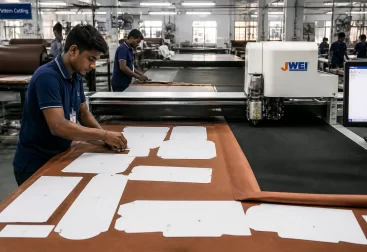
Panels are cut from rolls, usually in multiple layers, using dies or a cutting machine. The order of layers and the direction of the grain must match the approved sample, because variations here appear immediately in the finished bag.
Reinforcement pieces, foam, lining and stiffeners are cut at the same stage, and missing pieces are one of the most common causes of a stalled line.
Sub-assembly
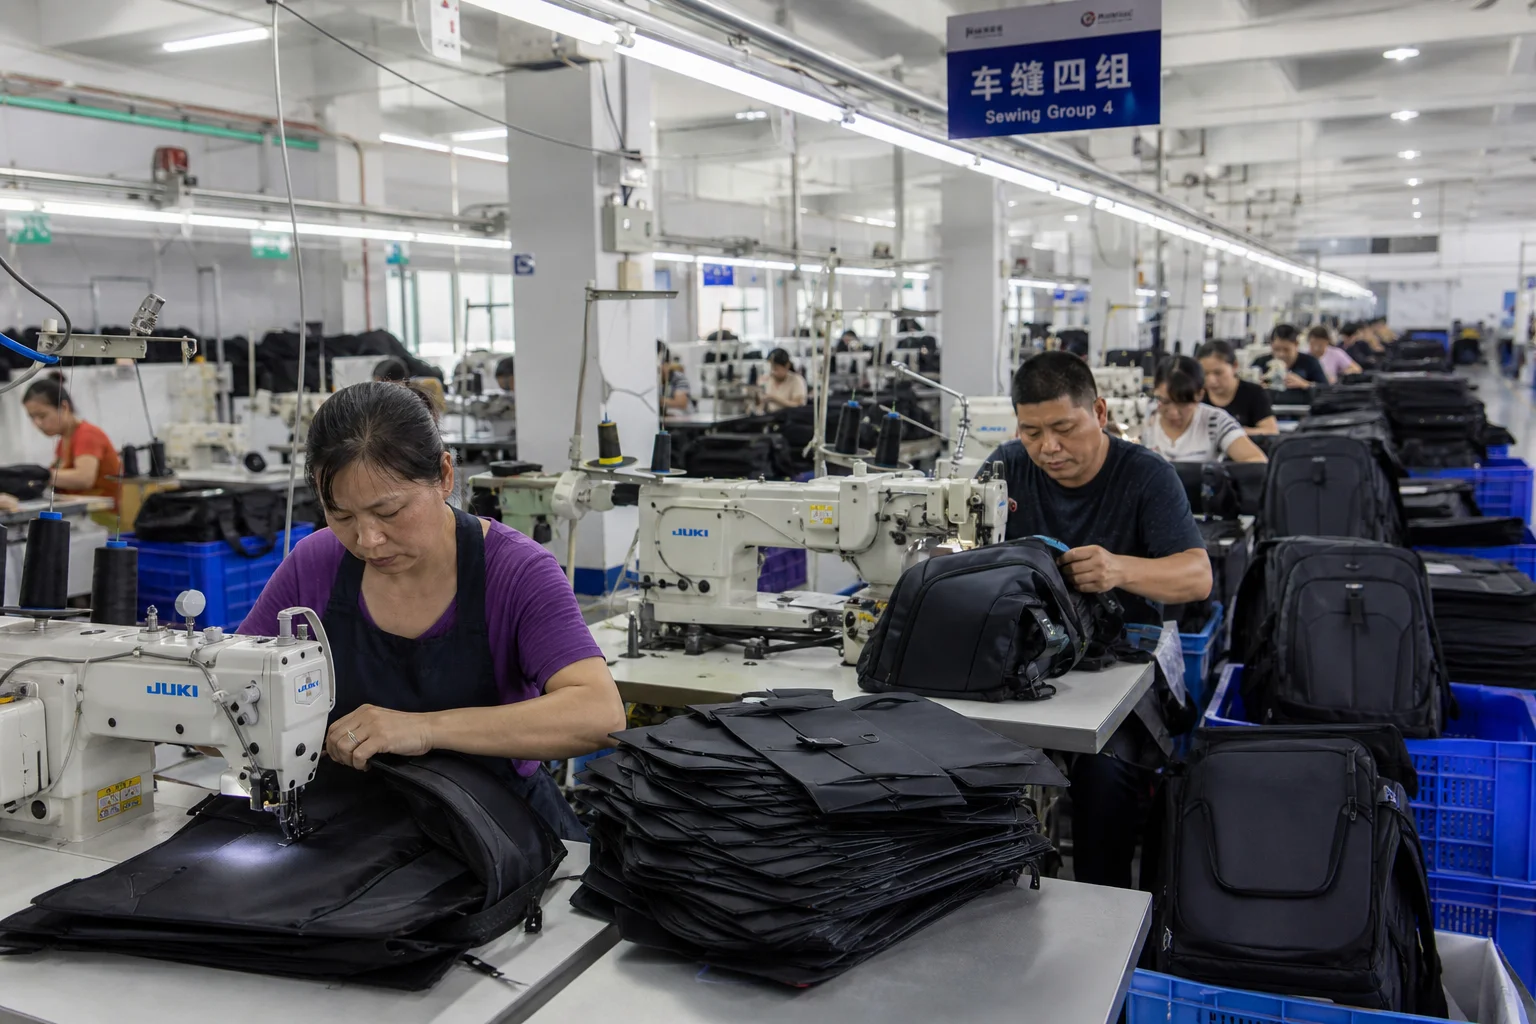
Small assemblies are built before the main body: zip openings, sleeve panels, strap assemblies, padded handles and pocket units. Sub-assembly is where most of the labour sits, and where most quality variation appears.
Building sub-assemblies separately also allows them to be inspected before they disappear inside the bag, which is far cheaper than discovering a fault at final assembly.
The sequence at a glance
| Stage | Activity | Quality focus |
|---|---|---|
| Material check | Rolls inspected against swatch | Colour, thickness, defects |
| Cutting | Panels, foam, lining, reinforcement | Dimensions, grain direction, complete sets |
| Edge prep | Edge paint, heat sealing, marking | Consistency, sealing at cut ends |
| Sub-assembly | Zips, pockets, straps, handles | Stitch quality, hardware setting |
| Main assembly | Body joined, back panel attached | Symmetry, alignment, seam strength |
| Lining and closing | Lining inserted, opening finished | Fit, no twisting, clean interior |
| Hardware and trim | Buckles, clips, labels, reflective tape | Position, function, strength |
| Final inspection | Function, appearance, measurement | Approved sample comparison |
| Packing | Stuffing, polybag, carton | Shape retention, protection |
The stages are consistent across styles; what changes is the number of sub-assemblies, the amount of reinforcement and the depth of the quality checks.
Where time is actually spent
Strap assembly and the padded back panel are typically the most labour-intensive parts of a backpack. On laptop and trekking styles, the sleeve construction and harness add further time.
That is why a shape change on the back panel costs far more production time than an equivalent change on a flat front panel, and why it should be finalised early.
Casual and Daypack Construction
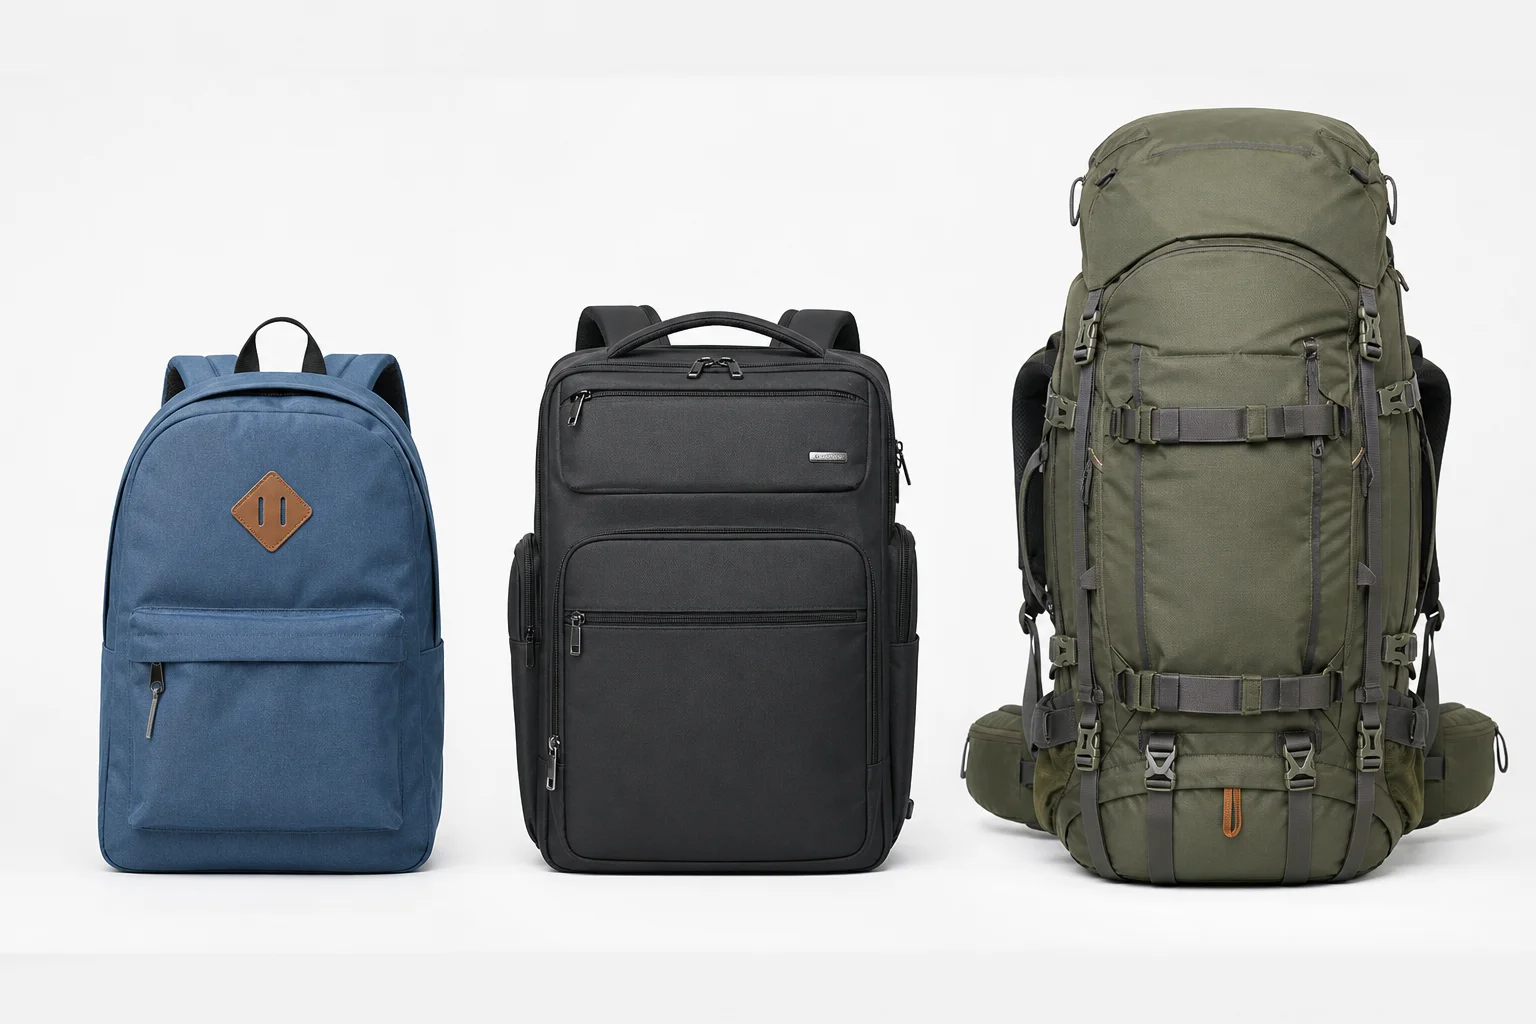
The casual daypack is the highest-volume backpack category, and its construction is deliberately simple to keep cost low while looking current.
Body construction
The body is usually a single main compartment with a front zip pocket, built from a flat front and back panel joined by a gusset or side panels. Fewer panels mean faster cutting and sewing.
Because there is no back frame, the bag holds shape only through the material and any light stiffener, which is acceptable for light loads and a short carry.
Straps and padding
Straps are typically simple webbing with light foam padding, sewn directly into the top of the body or attached through a loop. The back panel may have minimal padding or none.
This is adequate for a few kilograms carried briefly. It becomes uncomfortable quickly as the load or the duration increases, which is a deliberate trade rather than a defect.
Casual construction at a glance
| Element | Typical casual approach |
|---|---|
| Panels | Front, back, two sides or a gusset |
| Back panel | Minimal or light padding |
| Shoulder straps | Webbing with thin foam |
| Closure | Single main zip, optional front pocket |
| Base | Unreinforced or lightly reinforced |
| Hardware | Standard sliders and buckles |
| Stiffener | None or light |
Where a brand wants a daypack to feel more substantial at little cost, the most effective changes are a slightly thicker back panel, a reinforced base and better zips.
Where casual backpacks fail
Casual backpacks usually fail at the strap attachment or the base. Both areas take repeated stress and both are where cost was removed.
Adding a reinforcement panel at the strap anchors and a wear-resistant base panel addresses the two dominant failure modes for a modest cost increase.
Laptop and Business Backpack Construction
A laptop backpack is a protective product with a bag around it. Its construction exists to keep a device safe and to keep the wearer looking professional.
The padded sleeve
The sleeve is the defining feature: a foam-lined compartment sized to the device, with a padded base so the laptop never rests on the bottom of the bag. The base padding is the detail most often omitted and most often noticed by customers.
Sleeve fit matters more than sleeve padding thickness. A sleeve that allows the device to move freely provides less protection than a snug one with moderate foam.
Structure and appearance
Business backpacks need to hold their shape when empty, which requires stiffener panels and structured materials rather than soft foam alone. That structure also protects contents from being crushed.
Exterior construction is deliberately clean: concealed zips where possible, minimal topstitching, and hardware that matches the brand’s finish standards.
Business features and their construction
| Feature | Construction implication |
|---|---|
| Padded laptop sleeve | Foam plus base padding, measured to device size |
| Trolley sleeve | Rear panel opening sized for luggage handles |
| Document compartment | Flat panel with light stiffener, no creasing |
| Accessory organiser | Multi-pocket panel, bound edges |
| Structured back | Stiffener board plus breathable padding |
| Cable or power port | Reinforced opening, grommet or shaped hole |
| Concealed security pocket | Rear or back-panel access, discreet closure |
These features add panels and steps rather than material cost, which is why a business backpack’s price is driven by labour as much as by fabric.
Hardware and durability expectations
Customers at this price point inspect hardware closely. Metal zips, well-finished sliders and consistent plating read as quality, while mismatched finishes are noticed immediately.
Because the bag carries a high-value item, the load-bearing construction also needs to be strong enough that a strap failure never drops the contents.
Travel and Trekking Construction
Travel and trekking backpacks carry the heaviest loads for the longest periods, and their construction reflects that with load transfer rather than padding alone.
Frames, hip belts and load transfer
A trekking pack transfers weight to the hips through a hip belt and, where fitted, an internal frame or framesheet. The shoulders then stabilise rather than carry, which is what allows hours of carrying.
This is a genuinely different construction: the hip belt is a load-bearing assembly with its own reinforcement, stitching and hardware rating.
Access and capacity
Travel packs favour large openings, often a clamshell or panel zip, so the whole contents are visible. Trekking packs may use top access with a lid, prioritising stability over convenience.
Large openings place considerable stress on the zip and its surrounding panel, so they need reinforcement at the ends of the zip opening, which is where these bags most often fail.
Travel and trekking construction
| Element | Travel pack | Trekking pack |
|---|---|---|
| Back system | Padded, sometimes rigid | Framed, ventilated, adjustable |
| Hip belt | Optional, light | Load-bearing, padded |
| Access | Panel or clamshell | Top and side |
| Base | Heavily reinforced | Heavily reinforced |
| Straps | Adjustable, stowable | Full harness with load lifters |
| Carry handles | Multiple, all reinforced | Top loop, reinforced |
| Compression | Side straps | Side and lid straps |
Both categories justify heavier reinforcement, wider straps and rated hardware, because a failure with a 15 kilogram load is not a minor inconvenience.
Weight as a design constraint
Trekking buyers track the product weight, so reinforcement must be placed where it is needed rather than applied uniformly. Over-reinforcing a trekking pack makes it heavier and no more durable in use.
The practical approach is to reinforce the load path: hip belt, shoulder harness anchors, compression points and base, and to keep the rest of the body as light as the material allows.
School and Kids Backpack Construction
School backpacks are bought by adults and used by children, which creates a specific set of construction requirements.
Durability priorities
School bags are dragged, dropped and loaded with books. The base, the corners and the strap anchors fail first, so those are the areas to reinforce regardless of how attractive the front panel is.
A reinforced base panel with bound edges and a wear-resistant material addresses the most common complaint in this category.
Weight and fit for children
Weight matters more here than in any other category, because the user is smaller. Construction decisions that add weight — rigid frames, thick padding everywhere, heavy hardware — should be justified individually.
Straps need to be adjustable across a range, since a bag may be worn by a growing child for two or three years.
Kids-specific construction points
| Point | Reason |
|---|---|
| Reinforced base and corners | Most common failure point in use |
| Reflective material on front and straps | Visibility for the child in low light |
| Padded, adjustable straps | Fit across growth and light load comfort |
| Quick-release or safety closure | Considerations vary by market regulations |
| Easy-clean material | Resists marking and spills |
| Name label or tag | Practical requirement for school use |
| Age-appropriate size | Prevents an oversized load on a small frame |
Some markets regulate school bag safety requirements, including reflective area and load guidance. Those requirements belong in the specification from the start rather than as a post-production check.
Where brands add value in this category
The features parents respond to are durability, visibility and fit rather than fashion detail. A bag that survives a school year and remains comfortable is more valuable than one with a decorative front panel.
Testing expectations
School bags benefit from cyclic testing of the straps and of the zip opening, since both are used heavily by children. The results are also useful retail content for parents comparing options.
Back Panels and Carry Systems
The back panel and shoulder straps are what the customer feels. They are also the parts that determine whether a heavier load is comfortable or painful.
Back panel construction
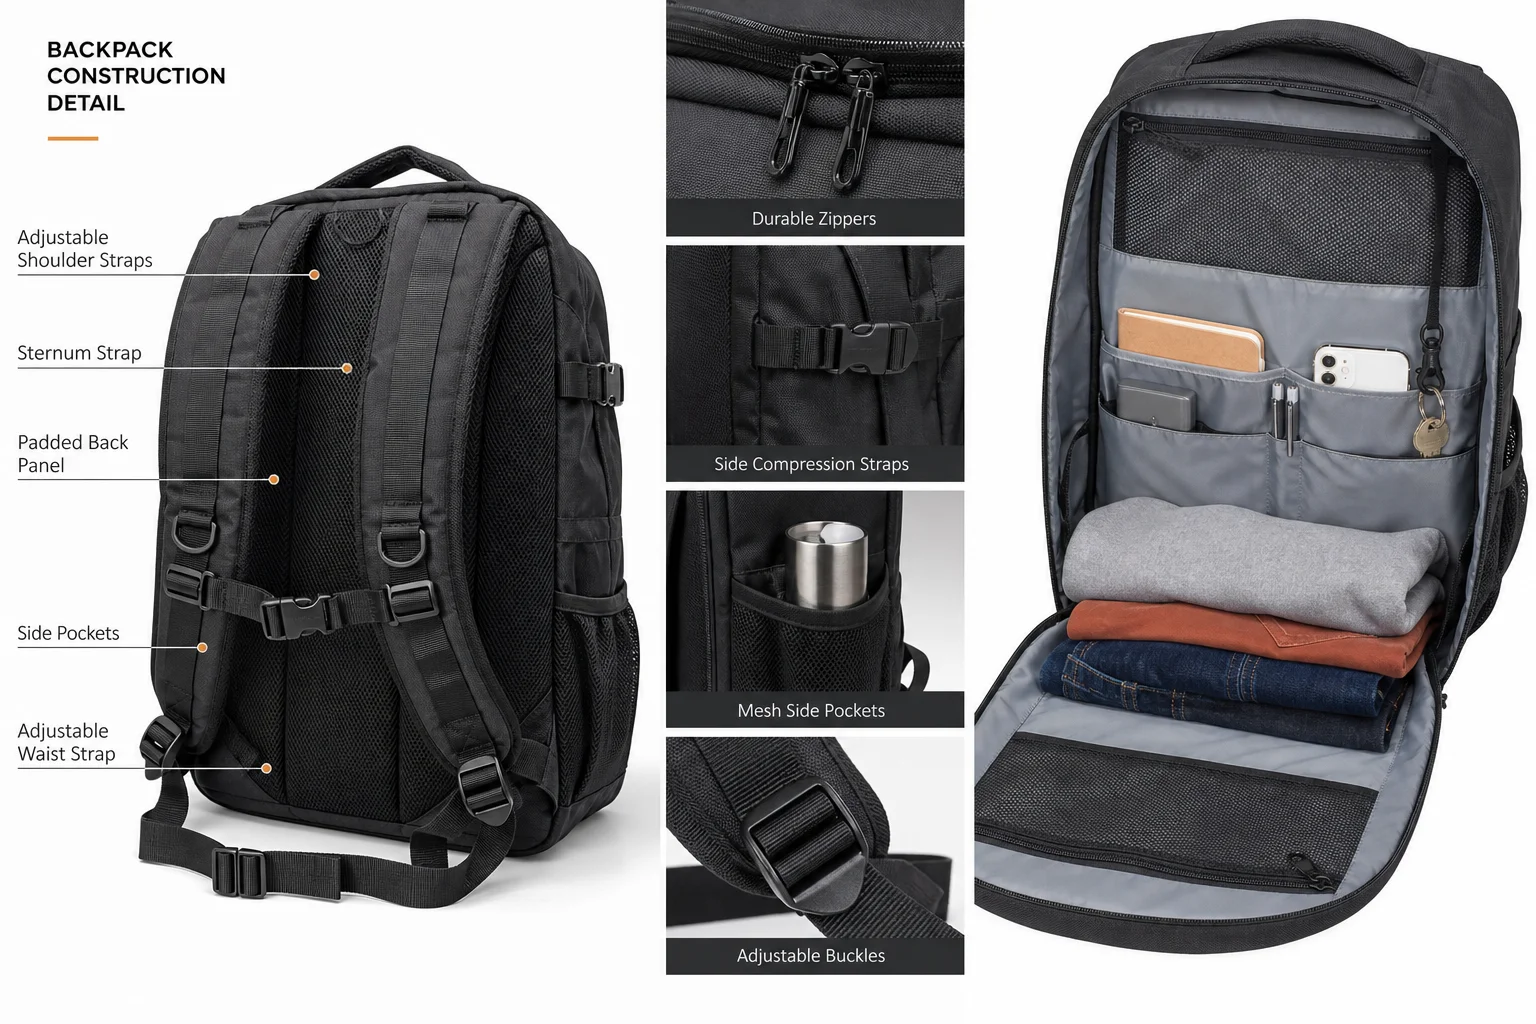
A back panel is usually a laminated assembly: an outer material, a foam layer for cushioning, a stiffener for shape and a lining against the body. The order and thickness of these layers determine both comfort and how the bag holds its shape.
Ventilation channels and mesh linings help with heat and moisture, which matters most on styles carried for long periods.
Shoulder strap construction
Shoulder straps are built as their own sub-assembly with foam, an outer shell and a lining, then attached to the body. The attachment point is the highest-stress location on the whole bag.
Adjustment hardware sits at the lower end of the strap, where a metal slider under load can become the first thing to wear or fail.
Carry system components
| Component | Function | Typical construction |
|---|---|---|
| Back panel | Comfort and shape | Laminated foam, stiffener, mesh lining |
| Shoulder straps | Carry and adjust | Foam core, outer shell, webbing adjustment |
| Sternum strap | Stabilise straps | Webbing with a slide or clip |
| Hip belt | Load transfer | Padded belt, reinforced attachment |
| Load lifters | Adjust strap angle | Webbing from strap top to body |
| Top handle | Lifting the bag | Padded grip, reinforced anchor |
| Compression straps | Reduce volume | Webbing with side-release buckles |
Each component adds cost and, in the case of the hip belt and frame, real weight. Their inclusion should follow from the load the bag is designed to carry.
Matching the carry system to the load
Padded straps alone are appropriate for light loads and short carries. Beyond a few kilograms or a longer period, load transfer to the hips becomes the difference between a usable bag and an uncomfortable one.
Specifying the expected load makes this decision straightforward: the system follows the weight, not the price point or the style trend.
Compartments and Organisation
Interior organisation is where a backpack differentiates itself on a shelf, and where construction complexity rises fastest.
How pockets are built
Pockets are built as sub-assemblies: the pocket panel is prepared with its zip or closure, then sewn onto the lining or the body. Each additional pocket adds a sub-assembly and a sewing step on a curved surface.
Pockets on the inside of a curved bag are more difficult to sew than flat exterior pockets, which affects both cost and quality consistency.
Balance between organisation and cost
| Organisation level | Construction impact | Customer perception |
|---|---|---|
| Single compartment | Lowest cost, fastest build | Simple, basic |
| Plus front zip pocket | One sub-assembly | Practical |
| Plus laptop sleeve | Foam and lining assembly | Protective, business-oriented |
| Plus organiser panel | Multiple small panels and binding | Highly organised |
| Plus trolley sleeve and hidden pocket | Additional panels on the rear | Travel-ready, premium |
Adding organisation increases perceived value up to a point, then adds clutter. Knowing the intended user’s daily contents is the best guide to how far to go.
Construction details that affect quality
Bound or piped pocket edges hold shape and resist fraying, while raw edges on interior pockets open up with use. Lining weight matters too: a very light lining tears at pocket mouths.
Where a pocket will hold something heavy, stitching through to an outer panel or adding an internal reinforcement keeps it from pulling away from the lining.
Materials and Reinforcement by Style
Material selection for a backpack is driven by abrasion exposure, weight expectation and appearance in roughly that order.
Bodies and bases
The base of a backpack contacts the ground repeatedly, so it usually warrants a heavier or more abrasion-resistant material than the body. Where the whole bag uses one material, a base panel in a tougher specification is a cheap improvement.
PU-coated materials are common in fashion-oriented styles, while woven synthetics with coatings dominate functional categories.
Linings and foams
Linings are typically polyester or nylon taffeta for lightness and quick drying. Foams vary in density and resilience: denser foam holds shape longer, while cheap foam compresses permanently after a season.
Foam quality is difficult to assess visually and easy to reduce silently, which is why density and thickness belong in the specification with a reference sample.
Reinforcement by style
| Style | Base | Back panel | Straps | Anchors |
|---|---|---|---|---|
| Casual daypack | Light | Light padding | Thin foam | Basic stitching |
| Laptop / business | Moderate | Stiffener plus foam | Moderate foam | Reinforced |
| Travel | Heavy | Structured | Padded, stowable | Heavily reinforced |
| Trekking | Heavy | Framed, ventilated | Full harness | Load-rated |
| School / kids | Heavy | Moderate | Padded, adjustable | Reinforced |
| Camera / gear | Heavy | Structured | Padded | Reinforced |
Reading across a row gives the material and reinforcement brief for a style, which is a fast starting point for a new development.
Trims that fail silently
Zips, sliders, mesh, webbing and foam are all susceptible to substitution, because the visible difference is small at the sample stage and large after a season of use.
Naming the supplier or a reference sample, and requiring samples of the actual trims for approval, is the practical control.
Quality Checks Specific to Backpacks
Backpack quality control extends beyond appearance, because a defect that looks minor in inspection can be a failure under load.
Function before appearance
Zips should be run through their full length, straps adjusted through their full range and hardware operated repeatedly. Function checks catch faults that a visual inspection passes.
Sleeve and compartment dimensions should be measured against the specification, particularly on laptop styles where a few millimetres decide whether a device fits.
Load-path inspection
Every attachment point should be inspected for stitch quality, reinforcement presence and hardware setting. This is the check that prevents field failures, and it takes seconds per unit.
A simple pull test on a sample per batch gives a documented result, and a cyclic test on the pre-production sample establishes the baseline.
Backpack inspection checklist
| Check | Method |
|---|---|
| Dimensions | Measure against specification |
| Symmetry | Compare left and right panels and straps |
| Zip function | Full travel, no catching, slider correct |
| Strap adjustment | Full range, adjuster holds under load |
| Attachment strength | Pull test per sampling plan |
| Hardware setting | Rivets tight, clips function, plating intact |
| Sleeve fit | Insert a device or a gauge of specified size |
| Interior finish | No raw edges, no loose threads, lining fitted |
| Padding | Position and thickness as specified |
| Labelling | Position, content, care information |
Running this list on the pre-production sample and then at final inspection keeps the delivered product aligned with what was approved.
Documenting the approved sample
The approved sample is the reference for everything that follows. Photographing it from every angle, recording measurements and keeping the physical sample sealed prevents disputes later.
Where materials are substituted, the substitution should be compared against that recorded reference rather than against memory.
A backpack is judged in the first week by how it looks and in the first month by how it carries. Construction decides which of those two the customer remembers.
Packing, Transport and Retail Presentation
How a backpack is packed affects how it arrives, and how it arrives affects how it is judged on the shelf and in a warehouse photograph.
Holding shape in transit
An empty backpack collapses, and the creases formed in a carton can persist after unpacking. Stuffing the body with paper or air pillows keeps the panels flat and the back system undistorted.
Padded straps and foam back panels are the parts most prone to permanent compression, so they benefit most from support inside the carton.
Protecting hardware and surfaces
Zips, sliders and clips can mark adjacent bags in transit, and coated materials can develop pressure marks where they touch. Tissue wrapping at contact points and separating bags within the carton prevents both.
Where bags are stacked, the weight should be carried by the carton rather than by the bags themselves, which is a packing layout decision rather than a material one.
Presentation for e-commerce
| Element | Purpose |
|---|---|
| Shape retention | Photographs reflect the intended silhouette |
| Product label and care card | Information and perceived quality |
| Dust bag or wrap | Protection and presentation |
| Consistent folding | Predictable retail appearance |
| Carton marking | Correct handling in the warehouse |
These details are inexpensive and are frequently the difference between a product that photographs well when it arrives and one that requires reshaping before it can be photographed at all.
Carton and barcode requirements
Carton dimensions, weight limits, label content, barcode placement and carton marks are usually defined by the retailer rather than the manufacturer. Collecting those requirements before production is cheaper than reworking packaging afterwards.
FAQ
What is the difference between a daypack and a trekking backpack in construction?
A daypack relies on light padding and simple panels. A trekking pack adds a framed back system, a load-bearing hip belt and a full harness so that weight transfers to the hips.
Which part of a backpack fails first?
Strap attachment points and the base. Both take repeated stress and both are frequently under-specified. Reinforcement at these two locations prevents most field failures.
How thick should laptop sleeve padding be?
The fit matters more than the thickness. A snug sleeve with moderate foam and a padded base protects better than a loose sleeve with thick foam.
Is a frame necessary on a travel backpack?
Not always. A stiffener and a padded back panel suit luggage-style travel where the bag is often carried by handles. A frame is more relevant when the pack is carried on the back for long periods.
Why do backpack straps lose their padding over time?
Cheap foam compresses permanently under load. Denser foam with better resilience holds its shape far longer, which is why foam density belongs in the specification.
How many pockets should a backpack have?
Enough to match the intended user’s contents without adding clutter and cost. A main compartment, a laptop sleeve and one or two small pockets cover most daily needs.
How much reinforcement does a school backpack need?
Concentrated at the base, corners and strap anchors rather than spread evenly. Those are the areas that fail in school use, and reinforcing them costs little.
Can the same construction be used across several backpack styles?
The build sequence is similar, but padding, reinforcement, hardware rating and back system must change with the load and use case. Sharing a construction across styles is how underbuilt products reach the market.
What tests are worth running on a backpack?
Function tests on zips, straps and hardware, dimension and fit checks, a pull test on the attachment points and a cyclic lift test on the loaded bag.
How do I keep trim quality consistent on repeat orders?
Name the trims precisely, approve physical samples and keep the approved sample sealed as a reference. Substitution is the main source of drift between runs.
What should a backpack technical pack include?
Drawings with dimensions, a bill of materials, panel and reinforcement details, back system construction, hardware specification and load or test requirements.
Next Steps: Build the Backpack to the Use Case
Backpack construction is a set of decisions that follow from the load, the duration and what the bag must protect. Getting those defined first is what keeps padding, reinforcement and hardware proportionate.
Send us your style, its intended use and the load it must carry, and we will propose the construction, materials and reinforcement for that specific brief.
Developing a backpack range and need the construction specified by style? Contact our team at info@gionar.com and we will prepare the build specification for each model.
Related reading: our custom bag manufacturing portfolio shows the backpack styles and constructions we produce.