- Why Private Label Is the Fastest Route to a Bag Brand
- Private Label, OEM, ODM and White Label Explained
- Step 1: Define the Product and the Position
- Step 2: Choosing the Right Factory Partner
- Step 3: Materials and Component Selection
- Step 4: Branding — Labels, Hardware and Packaging
- Step 5: Sampling and Approval
- Step 6: MOQ, Pricing and Payment Terms
- Step 7: Compliance, Labelling and Shipping
- Step 8: Production, Inspection and Launch
- Common Pitfalls and How to Avoid Them
- Planning the Timeline and the Budget
- FAQ
Why Private Label Is the Fastest Route to a Bag Brand
Most bag brands do not begin with a factory. They begin with a product idea, a target customer and a decision about how to get a sellable product without building a production line.
The problem private label solves
Building a bag from a blank sheet requires pattern making, prototyping, tooling, material development and a supply chain — an 18-month programme with substantial capital at risk before the first sale.
Private label compresses that timeline dramatically. An existing bag construction is used as the platform, and the brand applies its own materials, colours, labelling and packaging. The product is new to the market while the engineering is already proven.
What the brand still controls
Private label is often misunderstood as buying a generic product and adding a logo. In practice, the brand controls a substantial part of the specification: material face, colour, hardware finish, dimensions, interior layout, zips, branding method and packaging.
What the brand does not need to control is the underlying construction, which is where the cost and risk of development sit. That division is what makes the model efficient.
Private label versus building from scratch
| Factor | Private label | Built from scratch |
|---|---|---|
| Time to first sale | Months, not years | Long development cycle |
| Upfront cost | Lower — sampling and tooling limited | High — patterns, tooling, testing |
| Engineering risk | Low — construction already proven | High — untested designs |
| Differentiation | Through material, colour, branding, packaging | Fully original design |
| MOQ | Usually lower | Usually higher |
| Flexibility to change | Moderate — platform is fixed | Full, at a cost |
| Best suited to | New brands, range expansion, market tests | Established brands with volume |
Many established brands use both approaches at once: private label for the core range that must be reliable and repeatable, and original development for a small number of hero products.
What a realistic launch looks like
A first private label launch is usually small: one to three styles, a tight material palette and one branding method. The objective is to prove that the product sells and that the factory can repeat it, before committing to a wider range.
Because the platform is proven, the first order carries far less risk than a fully original development — which is precisely the point of the model.
Private Label, OEM, ODM and White Label Explained
The four terms are used loosely across the industry, and the differences matter because they determine how much control the brand has and how much work the factory does.
White label
A white label product is an existing bag sold under the brand’s name with little or no modification. The brand chooses from what the factory already makes and applies its label.
This is the fastest and cheapest route and is often used for testing a market. Its limitation is that the same product may be available to competitors, so differentiation is limited to branding and packaging.
ODM — original design manufacturer
An ODM factory maintains its own designs and offers them to brands for modification. The brand selects a design and changes materials, colours, hardware and branding to suit its position.
This is the most common private label arrangement in bags, because it balances speed with meaningful customisation. The construction stays proven while the product becomes visually and materially distinct.
OEM — original equipment manufacturer
An OEM arrangement means the factory builds to the brand’s own design. The brand supplies the tech pack, the patterns and the specification; the factory manufactures.
OEM offers maximum control and requires the brand to carry the design and development work. It suits brands with in-house design capability and sufficient volume.
The four models compared
| Model | Who designs | Brand control | Speed | Typical use |
|---|---|---|---|---|
| White label | Factory | Lowest — branding only | Fastest | Market testing, gifting, entry range |
| Private label (ODM) | Factory design, brand modifies | Moderate to high | Fast | Core retail range |
| OEM | Brand | Full | Slowest | Original design, established brands |
| Hybrid | Both | High | Moderate | Range with hero plus core |
In practice, most projects described as private label are ODM. Clarifying which model applies at the start prevents a significant misunderstanding about who is responsible for the design file.
Choosing the right model
The decision follows from two questions: how much design capability does the brand have, and how important is exclusivity?
Where a brand has no design team and needs to be selling within a season, ODM is the practical choice. Where exclusivity is the core of the brand proposition and volume supports it, OEM is the right investment.
Private label is a spectrum, not a single arrangement. The useful question is not which term applies, but who holds the design file — because that determines cost, speed and how easily a competitor can offer the same product.
Exclusivity and the design file
Where a modified ODM design is used, exclusivity should be agreed in writing. Many factories will not offer exclusivity on a stock design, but will agree to it once the brand’s modifications are substantial enough to make the product distinct.
Documenting which elements are exclusive — the material face, the colour, the hardware finish, the interior layout — gives the agreement something concrete to refer to.
Step 1: Define the Product and the Position
The first step is not selecting a bag. It is deciding what the product must do and who will buy it, because that determines every specification that follows.
Starting from the customer
A bag brand’s first product should answer a specific brief. Who carries it, in what situation, and what must it hold? A commuter, a student, a traveller and a parent each need different dimensions, weight and interior layout.
Writing this down in one paragraph produces a document that can be used to evaluate every candidate design against something other than personal preference.
The product brief
A workable brief covers the use case, the target retail price, the material direction, the size range, the key features and the branding method. It should fit on a single page.
The target retail price is the most consequential line, because it determines the material grade, hardware tier and branding method before any design discussion begins.
What the brief must fix
| Element | Decision | Why it matters |
|---|---|---|
| Use case | Primary carrying situation | Drives size, weight and structure |
| Target retail price | Price band | Sets material and hardware tier |
| Size range | One size or several | Affects MOQ and tooling |
| Material direction | PU leather, coated fabric, canvas feel | Sets the visual language |
| Key features | Laptop sleeve, bottle pocket, etc. | Drives interior construction |
| Branding method | Woven label, metal plate, emboss | Affects sampling and unit cost |
| Target quantity | First order size | Determines MOQ feasibility |
| Launch window | Target season or date | Sets the development timeline |
Each of these is a decision the brand must make rather than the factory, because they define the position rather than the construction.
Pull the price back from retail
A useful discipline is to work backwards from the intended retail price. Subtracting the retailer margin, the brand margin, logistics, duties and packaging leaves a target landed cost, which in turn indicates the achievable material and hardware grade.
Brands that skip this step often approve a beautiful sample and then discover the product cannot retail profitably at the intended price.
Positioning and the visual language
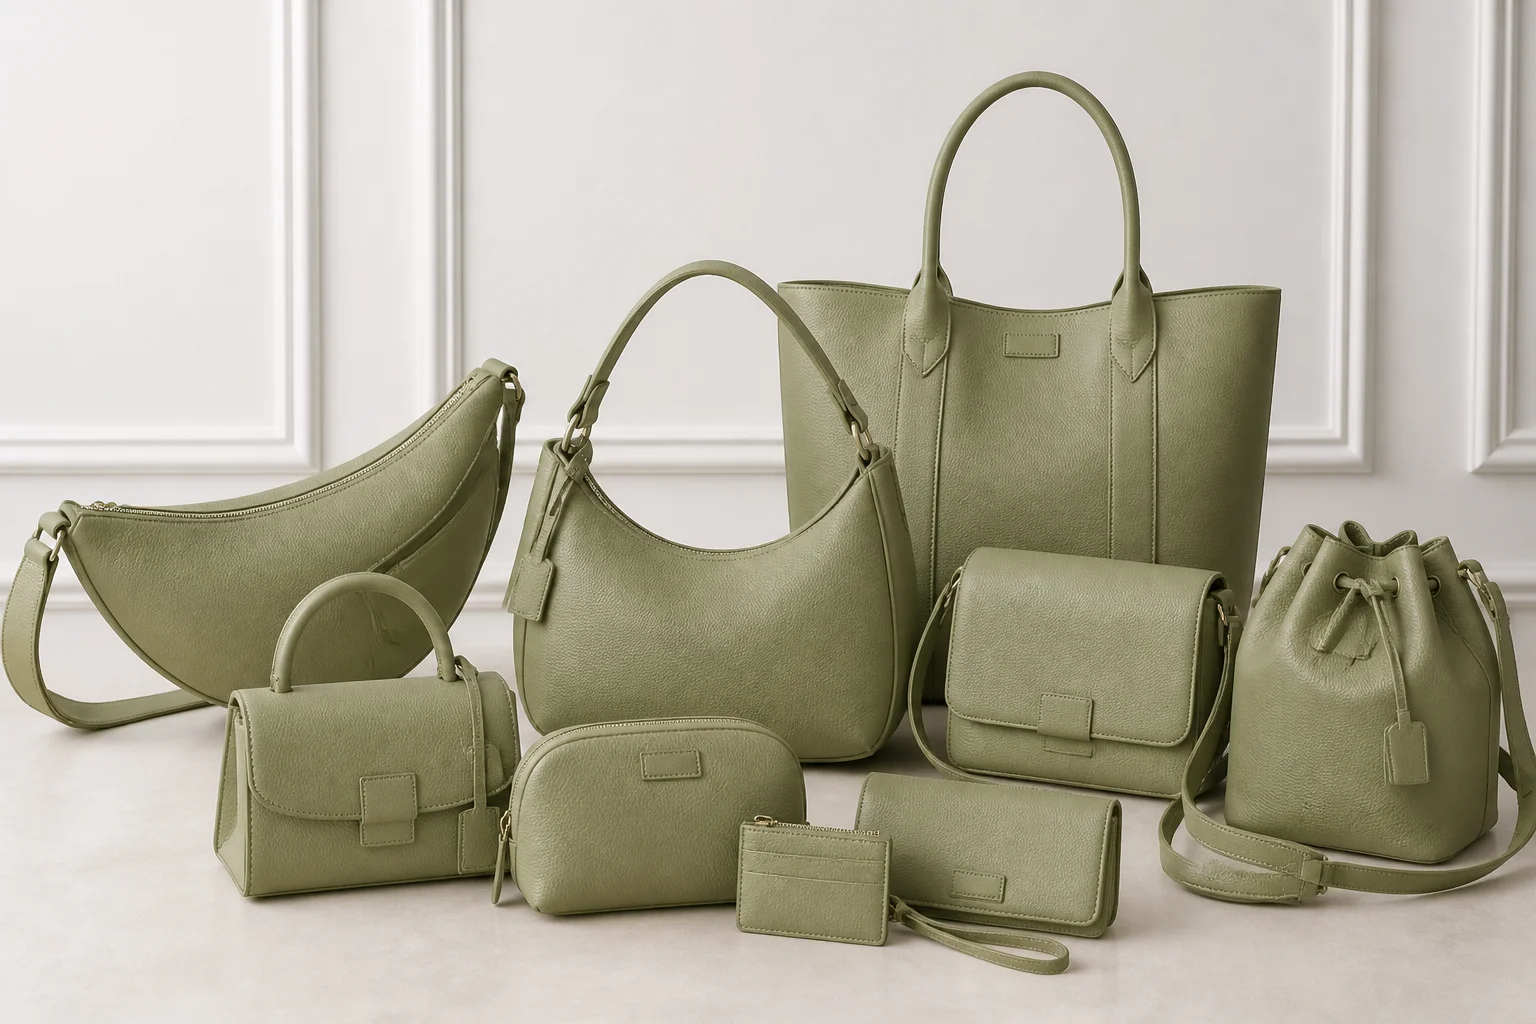
Two brands can use the same platform and produce entirely different products through material, colour and hardware choices. A matte, minimal palette with brushed hardware reads very differently from a glossy finish with polished brass, even on identical construction.
Defining the visual language early — colours, finishes, hardware tone — keeps decisions consistent as the range develops and makes the sampling process much faster.
Step 2: Choosing the Right Factory Partner
The factory relationship determines whether the launch is smooth or difficult, and it is worth more diligence than any single design decision.
What to look for
The right partner makes the product category the brand needs, at the right quality level, in the right volume. A factory that excels at large travel bags may not be the best source for small structured crossbody bags.
Category experience matters more than size. A focused factory will have the patterns, the hardware sources and the sewing skills specific to the product being made.
Evaluation criteria
| Criterion | What to check |
|---|---|
| Category fit | Experience with this bag type, not just bags generally |
| Sample quality | Stitching, edge finish, hardware setting, alignment |
| Communication | Response time, clarity, willingness to explain |
| MOQ flexibility | Willingness to support a realistic first order |
| Material sourcing | Access to the needed faces, hardware and trims |
| Capacity | Able to deliver within the launch window |
| QC process | Documented inspection, not verbal assurance |
| Compliance support | Awareness of labelling and material requirements |
| References | Existing brand customers and their experience |
Buying samples from several factories before committing is inexpensive and reveals more than any amount of correspondence. The sample shows the real standard of the production floor.
The first conversation
An efficient first approach shares the brief and asks three questions: can you make this product, what is your MOQ for it, and what is the development timeline from sample approval to shipment?
The answers indicate whether the factory works at the brand’s scale. A factory that quotes an MOQ far above the first order, or a timeline that misses the launch window, is a mismatch regardless of quality.

Relationship versus transaction
Private label depends on repeatability. The second order must match the first, and a supplier who understands the product will maintain consistency far better than one treating each order as a transaction.
Factories also allocate capacity to customers they know and trust. A good relationship becomes a practical advantage during peak production periods.
Avoiding the wrong partner
The most common mismatches are a factory that is too large for the first order, one whose quality standard sits above or below the brand’s price band, and one that accepts a product outside its category experience.
Each of these can be identified before the first order by checking references, reviewing samples and asking directly which products the factory makes most often.
Step 3: Materials and Component Selection
Material and component choices convert a generic platform into a branded product, and they are where most of the brand’s differentiation budget is spent.
How far material choice goes
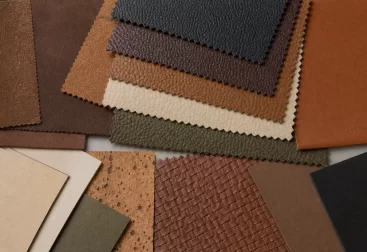
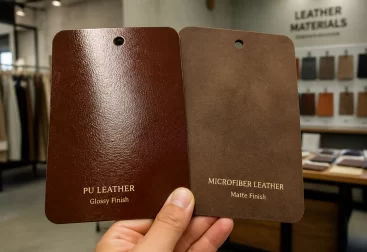
The same construction in a glossy patent finish, a matte pebbled face or a smooth fine-grain material reads as three different products at three different price points.
Material selection is therefore the highest-leverage decision in private label development. It changes the perceived position of the product more than any other single choice.
Material decisions
| Decision | Options | Effect |
|---|---|---|
| Face finish | Matte, satin, glossy | Sets the visual and price signal |
| Grain | Smooth, pebbled, embossed | Hides wear or shows it |
| Weight | Light to substantial | Structure, durability, weight |
| Base fabric | PU, coated fabric, blended | Durability and cost |
| Colour | Core palette plus accents | Range coherence |
| Lining | Woven, twill, printed | Perceived interior quality |
| Trim co-ordination | Matching or contrasting | Design identity |
A limited palette — two or three body colours and one hardware tone — produces a coherent range and simplifies production, which in turn reduces cost and the risk of material mismatch between batches.
Hardware as brand signature
Hardware tone and shape are strong identity signals. A distinctive zip pull, a particular ring profile or a specific buckle style recurs across the range and becomes recognisable.
Where a custom hardware shape is used, it requires a mould, which is a tooling investment with its own minimum quantity. For a first order, selecting from existing hardware and specifying a distinctive finish is usually the more efficient route.
Materials and the price band
Material selection must be consistent with the price band rather than aspirational. A material that costs more than the target landed cost allows will not work, however well it photographs.
Testing a small number of faces in the same colour is a practical way to compare appearance against cost before committing to a full range.
Step 4: Branding — Labels, Hardware and Packaging
Branding is what makes the product the brand’s product rather than an anonymous bag, and it is the most visible outcome of the private label process.
Branding methods
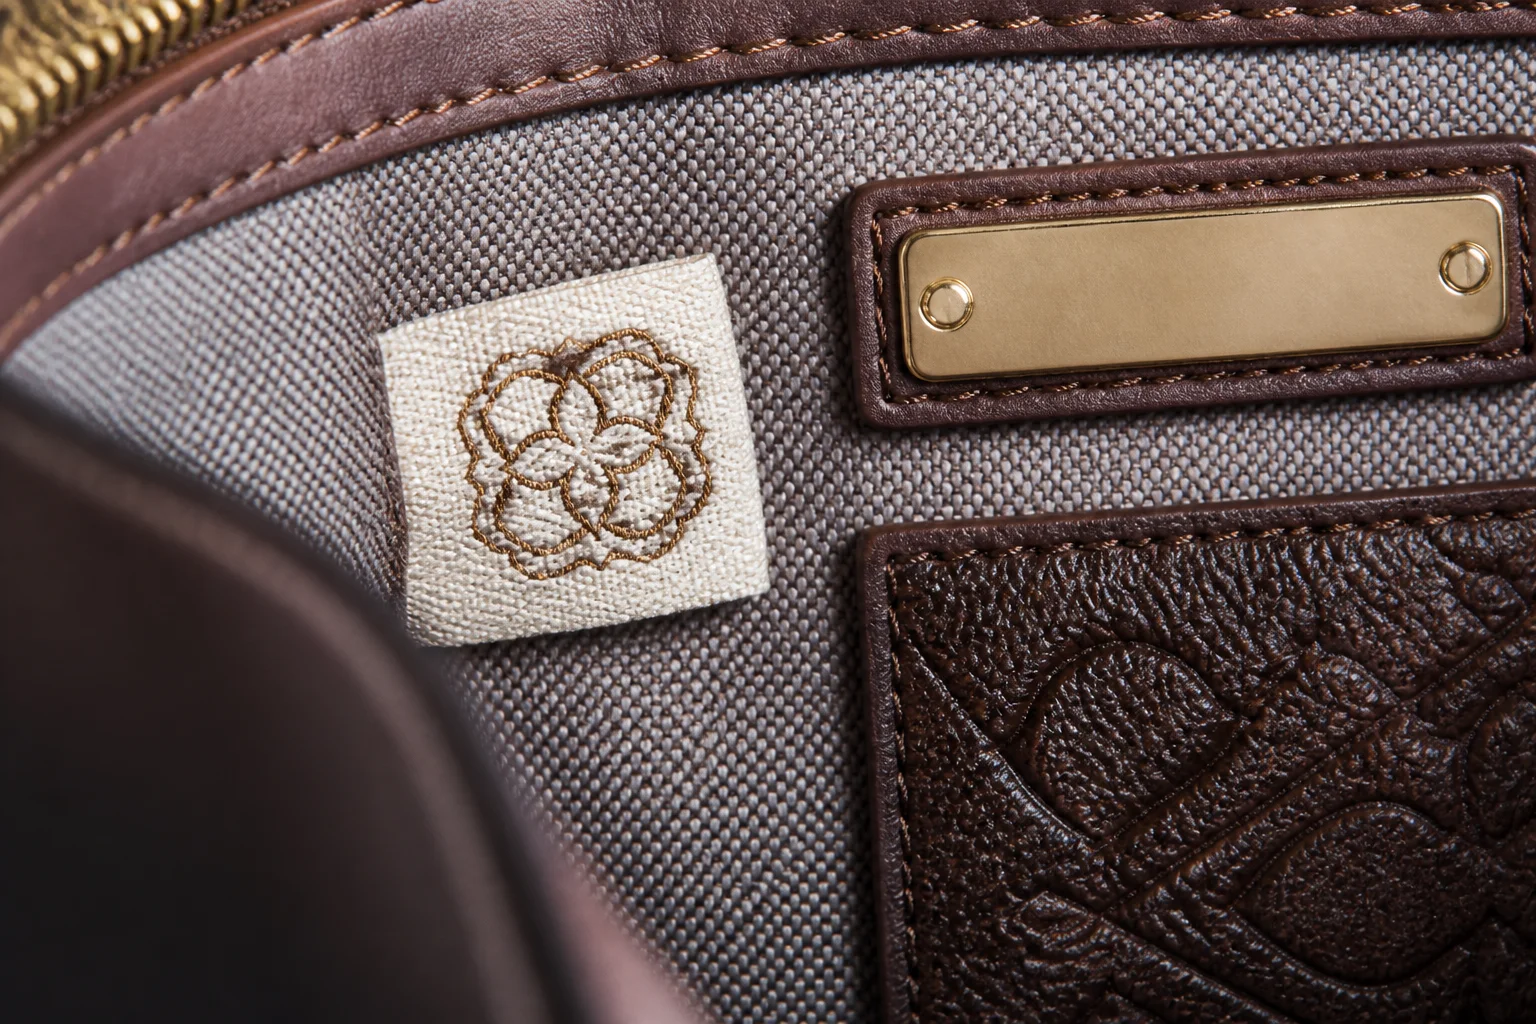
Woven and printed labels, metal plates, embossing, debossing and heat transfer all deliver different effects at different costs. The right choice depends on the material the mark sits on and the impression the brand intends.
On coated and PU materials, embossing and metal plates generally read as more premium than a sewn label, because they become part of the surface rather than an addition to it.
Branding methods compared
| Method | Effect | Best on | Tooling |
|---|---|---|---|
| Woven label | Classic, detailed | Interior seams, lining | Low — label setup |
| Printed label | Fine detail, flat | Interior, packaging | Low |
| Metal plate | Premium, durable | Exterior panels, closures | Moderate — die |
| Embossing | Subtle, integral | PU and coated material | Moderate — die |
| Debossing | Recessed, tactile | PU and leather-look faces | Moderate — die |
| Heat transfer | Crisp, flexible | Fabrics, linings | Low to moderate |
| Custom hardware | Strong signature | Zips, rings, buckles | High — mould |
Most first ranges combine two methods: a discreet mark on the exterior and a label inside. This gives the product identity at every touch point without the tooling cost of full customisation.
Where the mark goes
Placement is as important as the method. A mark on the front panel is a statement; one inside the bag is a private detail the customer discovers.
Consider how the bag is carried and how it is photographed. A mark that is hidden when the bag is worn contributes little to brand recognition, however well executed.
Packaging as part of the product
For a brand selling online, the packaging is often the first physical contact with the customer. A dust bag, a care card and a well-designed carton cost relatively little and carry a disproportionate share of the perceived value.
Packaging also protects the product in transit, which reduces returns. A crushed bag arriving at a customer is a quality failure even when the bag itself is flawless.
Consistency across the range
Branding elements should be consistent across every style: the same label position, the same hardware tone, the same packaging. Consistency is what turns several products into a recognisable range.
Documenting the branding specification in a single sheet makes it easy to apply the same standard to later products and to new factories.
Step 5: Sampling and Approval
Sampling is where the design becomes a physical product and where most of the true development work happens. It is also the stage that most often determines the timeline.
The sampling sequence
A typical sequence runs from a pre-production sample, through corrections, to a final approved sample that serves as the production reference. Each round takes time because materials must be sourced and the sample assembled.
Budgeting for two or three rounds is realistic. Expecting approval after one round usually produces either a compromised product or a rushed decision.
What to check on a sample
| Area | What to verify |
|---|---|
| Dimensions | Within tolerance, matches the brief |
| Material | Correct face, colour and weight |
| Stitching | Consistent density, clean starts and finishes |
| Edge finish | Painted, folded or bound consistently |
| Hardware | Correct finish, securely set, functions smoothly |
| Branding | Position, size, alignment of every mark |
| Interior | Pockets fit intended contents, lining clean |
| Structure | Holds shape when loaded |
| Weight | In line with the target |
Reviewing the sample with the actual intended contents is more informative than looking at it empty, because fit problems appear only when the product is used as intended.
The approved sample
The approved sample becomes the production standard. It should be signed, dated and photographed, and a set of reference photographs should be sent to the factory alongside the approval.
This is the single most useful document in the whole project. When a later batch is questioned, the sealed sample is the objective reference.
Managing revisions
Collecting all comments before sending them to the factory is more efficient than sending corrections incrementally, because each instruction triggers a separate review on the production side.
Prioritising comments also helps: distinguishing changes that must happen from preferences allows the factory to focus on what affects the product.
Step 6: MOQ, Pricing and Payment Terms
The commercial terms determine whether the product can succeed commercially, and they should be agreed before sampling finishes rather than after.
Understanding MOQ
The minimum order quantity is driven by material minimums, hardware minimums and the setup time for a production line. It is usually negotiable in structure rather than in size.
A factory may accept a lower total quantity if the order uses fewer colours, if materials are already in stock, or if the first order is treated as part of a larger commitment.
Cost structure
| Cost element | Driver |
|---|---|
| Materials | Face material, lining, interlining, thread |
| Hardware and trims | Zip, rings, buckles, branding components |
| Labour | Number of operations, complexity |
| Branding | Method, tooling amortisation, per-unit cost |
| Packaging | Dust bag, carton, inserts |
| Tooling | Moulds and dies, one-off |
| Testing and compliance | Testing requirements for the market |
| Freight and duties | Mode, volume, destination |
Labour cost falls per unit as quantities rise, while material cost is largely linear. This is why larger orders improve the price on complex products more than on simple ones.
Payment structures
Typical arrangements involve a deposit to begin production and the balance before shipment, with the exact split subject to negotiation and to the relationship.
Escrow services and third-party inspection payments are sometimes used on larger orders. Whatever structure is agreed, it should be documented clearly before production begins.
Reading a quotation
A quotation should break down the cost elements above rather than present a single figure. Where a breakdown is not provided, asking for one makes it much easier to compare suppliers and to see where savings could be found.
Comparing quotations is only meaningful when they are built on an identical specification. Otherwise the lower price usually reflects a different product.
Step 7: Compliance, Labelling and Shipping
Compliance requirements vary by destination market and by material, and they should be confirmed before the order is placed rather than after.
Labelling and material requirements
Many markets require origin marking, fibre composition labelling for textiles, and specific care and safety information. Chemical restrictions on certain substances apply to coated materials and to inks and dyes.
Because requirements change, they should be verified against the current rules of the destination market. The factory can usually advise on common requirements, but the brand remains responsible for compliance in its own market.
What to confirm before production
| Item | Action |
|---|---|
| Origin marking | Confirm required wording and placement |
| Composition labelling | Confirm fibre content declaration rules |
| Care instructions | Confirm required language and format |
| Chemical restrictions | Confirm limits for the destination market |
| Testing reports | Request relevant reports from material suppliers |
| Packaging requirements | Confirm recycling and material markings |
| Carton marking | Confirm shipping and handling marks |
Requesting compliance documentation early avoids the situation where a finished shipment cannot be cleared into its destination market.
Shipping modes
Air freight moves quickly and costs more; sea freight costs less and takes considerably longer. For a first order aimed at a specific season, the choice is usually driven by the launch date rather than by unit cost.
Where volume is moderate, consolidation with other shipments or a mixed mode can offer a middle path. The decision should be taken with the delivery date and the sales calendar in view.
Incoterms and responsibility
Incoterms define where the seller’s responsibility ends and the buyer’s begins, and they materially change the quoted price. Agreeing them explicitly prevents both cost surprises and disputes over who arranges freight, insurance and clearance.
Step 8: Production, Inspection and Launch
Once the sample is approved and the terms agreed, the project moves into production, where the objective is simply that the delivered goods match the approved sample.
Pre-production confirmation
Before the line starts, confirm the materials, the approved sample, the branding dies and the packing specification. A short pre-production check prevents small misunderstandings from becoming a full batch of incorrect goods.
Confirming that materials have arrived and that the branding tooling is ready also gives an early indication of whether the delivery date is realistic.
Inspection
| Stage | Focus |
|---|---|
| Incoming materials | Correct face, colour and weight against approved standard |
| In-line | Stitching, alignment, hardware setting |
| Pre-final | Branding position, dimension check, function |
| Final inspection | Sampling inspection against the approved sample |
| Packing check | Dust bags, inserts, carton marks |
| Loading check | Carton count and condition at loading |
Final inspection against a documented sampling plan, with results recorded, gives the brand an objective basis for approving shipment.
Advertising and launch preparation
Because production takes time, marketing preparation should run in parallel rather than after delivery. Photography, copy and listing preparation can all be completed while the goods are in production.
Photographing the approved sample rather than waiting for bulk goods is common practice and allows the launch to be scheduled with confidence.
Restocking and the repeat order
The strength of private label is repeatability. Once the approved sample exists, a repeat order requires far less work than the original, and the material and hardware are already qualified.
Tracking which styles sell allows the next order to weight quantity towards proven products instead of repeating a broad launch range.
Common Pitfalls and How to Avoid Them
Most first private label projects encounter the same small set of problems. Each is predictable and each has a straightforward prevention.
Design and specification pitfalls
| Pitfall | Prevention |
|---|---|
| Brief never written down | One-page brief before any sampling |
| Price band not checked | Work back from target retail to landed cost |
| Too many styles in the first order | Launch with two or three, then expand |
| Material chosen on appearance only | Check weight and durability alongside look |
| Branding tooling underestimated | Confirm die and mould costs before approval |
These are all decisions the brand controls, which makes them the easiest class of problem to prevent.
Timeline and communication pitfalls
| Pitfall | Prevention |
|---|---|
| Sampling rounds underestimated | Budget two to three rounds |
| Comments sent incrementally | Collect and prioritise before sending |
| Launch date tied to earliest possible delivery | Allow buffer for inspection and freight |
| Changes requested after production starts | Freeze the specification at approved sample |
| Single point of contact unclear | Agree one contact on each side |
Timeline problems are usually communication problems. A single point of contact on each side and a written specification remove most of them.
Quality pitfalls
The most common quality failure is drift from the approved sample: a slightly different material shade, a hardware finish that is close but not exact, or a branding position that has shifted. All are visible at inspection.
Retaining the sealed approved sample and reference photographs makes drift detectable immediately, and it gives any discussion with the factory an objective basis.
Private label succeeds when the brand owns the specification and the factory owns the execution. Where the boundary between those two responsibilities is unclear, problems accumulate — usually at the point where a decision should have been made and was not.
Scaling after a successful launch
Once a product sells reliably, the next steps are usually additional colourways, then adjacent styles using the same platform, then deeper quantities as the price improves.
Each expansion carries less risk than the launch, because the platform, the supplier and the specification are already established and proven in market.
Planning the Timeline and the Budget
Private label projects rarely fail on design. They fail on schedule and on cash flow, because both are estimated optimistically at the start and corrected too late to matter.
Working backwards from the launch date
The launch date should be treated as fixed and everything else derived from it. Starting from the target season and subtracting freight, inspection and production time gives the date by which the sample must be approved.
Subtracting the sampling rounds in turn gives the date by which the brief and the material selection must be finalised. Working in this direction is what makes a timeline credible.
Indicative timeline for a first range
| Stage | Typical duration | Depends on |
|---|---|---|
| Brief and positioning | Short — days | Internal decisions |
| Factory selection and enquiry | Weeks | Number of suppliers approached |
| Material sourcing | Weeks | Availability of the chosen faces |
| Sampling rounds | Several weeks | Number of rounds required |
| Branding tooling | Weeks | Method and die or mould lead time |
| Sample approval | Days | Decision speed on the brand side |
| Production | Weeks | Quantity and factory load |
| Inspection | Days | Sampling plan and results |
| Freight | Days to weeks | Mode chosen |
The purpose of the table is not precision but order of magnitude. Its value is that it shows where the launch date is actually determined: almost always at sampling and at material sourcing, not at production.
Budget beyond the unit price
The unit cost is only part of the investment. Sampling charges, tooling, testing, freight, duties, packaging and photography all sit alongside it and are frequently underestimated.
Listing them explicitly before the order is placed turns a unit price into a realistic project budget and prevents the common situation where a product is profitable on paper but not in cash.
Cash flow and the first order
A first order ties up cash before any revenue arrives. The deposit, the balance before shipment and the freight cost all fall in the same window, while sales begin only after the goods land.
Planning for that gap — by keeping the first order modest, or by staging it across two smaller orders — is a more reliable protection than optimistic sales forecasting.
When to expand the range
Expansion is best driven by evidence. Once a style sells consistently and the factory has repeated it reliably, adding a colourway or an adjacent style carries low risk and benefits from the same tooling and materials.
The efficient sequence is therefore platform first, then colour, then adjacent styles, then depth of quantity as the price improves with volume.
FAQ
What is the difference between private label and OEM?
Private label uses a factory design that the brand modifies, which is effectively ODM. OEM means the factory builds to the brand’s own design and tech pack. OEM gives more control and requires more development capability.
What is a realistic MOQ for a first private label order?
MOQ depends on the styles, materials and hardware. It is usually more negotiable in structure than in total quantity, for example by limiting colours or using materials already in stock.
How long does private label development take?
Development typically runs from several weeks for a straightforward modification to several months where new materials and branding tooling are involved, plus production and freight time.
Can I get exclusivity on a private label design?
Often yes, once your modifications are substantial enough to make the product distinct. Exclusivity should be agreed in writing, specifying which elements are exclusive.
How many sample rounds should I budget for?
Two to three. The first confirms the design direction, the second corrects detail, and the third, where needed, confirms production readiness.
What should the approved sample be used for?
As the production standard. It should be signed, dated and photographed, and the photographs sent to the factory so that later batches can be checked against an objective reference.
How much does branding cost?
Labels and transfers have low setup and modest per-unit cost. Metal plates, embossing dies and custom hardware require tooling, so they are better suited to orders with sufficient volume to amortise it.
Who is responsible for compliance in my market?
The brand is responsible for compliance in the destination market, although factories can usually advise and provide supplier test reports. Confirm requirements before production begins.
Should I use one factory or several?
For a first range, one factory is simpler and produces a more consistent product. Multiple suppliers become useful later, when volume or category differences justify the added coordination.
How do I avoid quality drift between batches?
Seal the approved sample, keep reference photographs, and inspect each batch against them. Documented final inspection with recorded results is the practical control.
When should marketing preparation start?
In parallel with production, not after it. Photography of the approved sample, copy and listing preparation can all be completed before the goods arrive.
What is the most common first-order mistake?
Launching too many styles at once. Two or three proven styles give a clearer read on demand and reduce the capital tied up in unproven products.
Next Steps: Own the Specification, Not the Line
Private label lets a brand reach market without building a factory, provided the brand owns the brief, the material and branding specification, and the approval of the sample.
Send us your product brief and target price band, and we will propose the platform, materials, branding methods and MOQ that suit your launch.
Launching a private label bag brand and want the specification handled properly? Contact our team at info@gionar.com and we will prepare a development plan for your first range.
Related reading: our custom bag manufacturing portfolio shows the private label programmes we run for brands.