What Do Tooling and Mould Costs Add to Your First Bag Order?
Tooling is the line item that surprises first-time buyers most. A quotation that looked competitive per unit suddenly carries an extra charge measured in hundreds or thousands, payable before a single bag ships.
The confusion is understandable, because tooling is not a product cost in the usual sense. It is a one-time investment in the equipment that makes your specific design repeatable. Once made, it serves every subsequent order of that design.
What makes tooling hard to compare is that the definition varies. One factory quotes cutting dies only. Another includes embossing plates, printing screens, sewing templates and hardware moulds. Two quotations for the same bag can differ substantially because they include different things.
Tooling also interacts with order quantity in a way that is easy to miss. A die that costs a fixed amount is trivial across fifty thousand units and significant across five hundred. The same charge can be sensible or absurd depending on volume.
This article covers what counts as tooling in bag production, how each tooling type is made and priced, how costs are quoted and amortised, what drives them up, who owns the tooling afterwards, when tooling can be avoided entirely, and how to place it in the production timeline. The aim is to make a tooling quotation legible rather than alarming.
- What Counts as Tooling
- Cutting Dies and Knife Moulds
- Embossing Plates and Grain Tooling
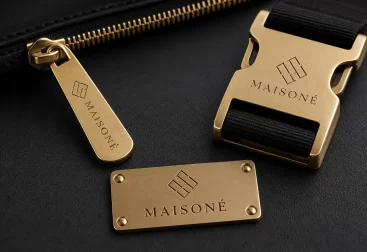
- Hardware Moulds and Custom Parts
- Printing Screens, Plates and Labels
- Sewing Jigs and Templates
- How Tooling Is Quoted and Amortised
- What Drives Tooling Cost Up
- Approving Tooling Before Mass Production
- Ownership, Storage and Reuse
- When Tooling Is Not Needed
- Reducing Cost Without Losing Quality
- Tooling in the Order Timeline
- FAQ
What Counts as Tooling
Tooling is any purpose-built item that exists only to make your design. It is not consumed in production, and it is not resaleable to another customer.
The five common categories
Cutting dies shape panels. Embossing plates create surface texture or logos. Hardware moulds produce custom metal parts. Printing screens, plates or cylinders apply graphics. Sewing jigs and templates control stitch placement.
Most bag programs need at least cutting dies, and many need two or three of the others. A quotation that lists only dies is usually incomplete rather than cheap.
What is not tooling
Existing hardware from a catalogue, standard buckles, stock lining materials and standard thread require no tooling. Neither does a design that uses only straight cuts and existing embossing patterns.
Distinguishing tooling from material and labour matters, because tooling is charged once, while material and labour are charged per unit.
Why the definition matters commercially
If a factory includes tooling in the unit price, the comparison with another factory that charges it separately becomes meaningless. The unit prices will differ and neither will reflect the true first-order cost.
The only reliable comparison is total landed cost for the first order, tooling included.
Tooling is not a hidden fee. It is a capital cost the buyer pays once, and the clarity of the quotation tells you a lot about how the factory works.
Cutting Dies and Knife Moulds
Cutting dies are the most common tooling item and usually the first one quoted.
How a cutting die is made
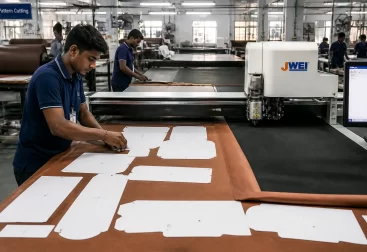
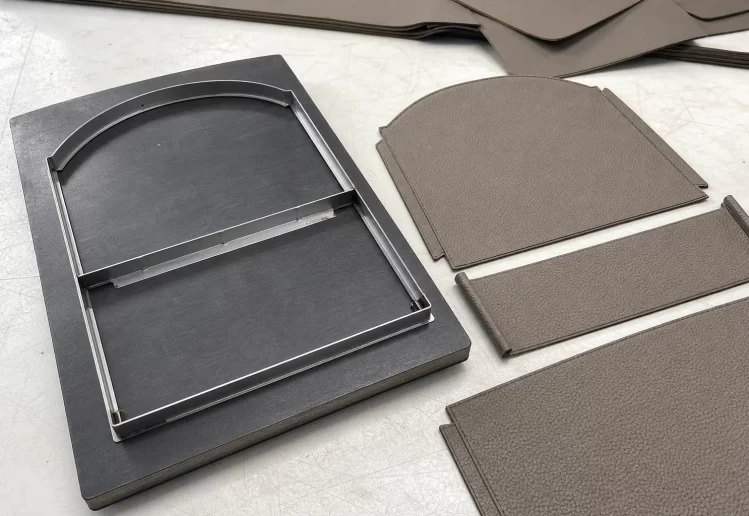
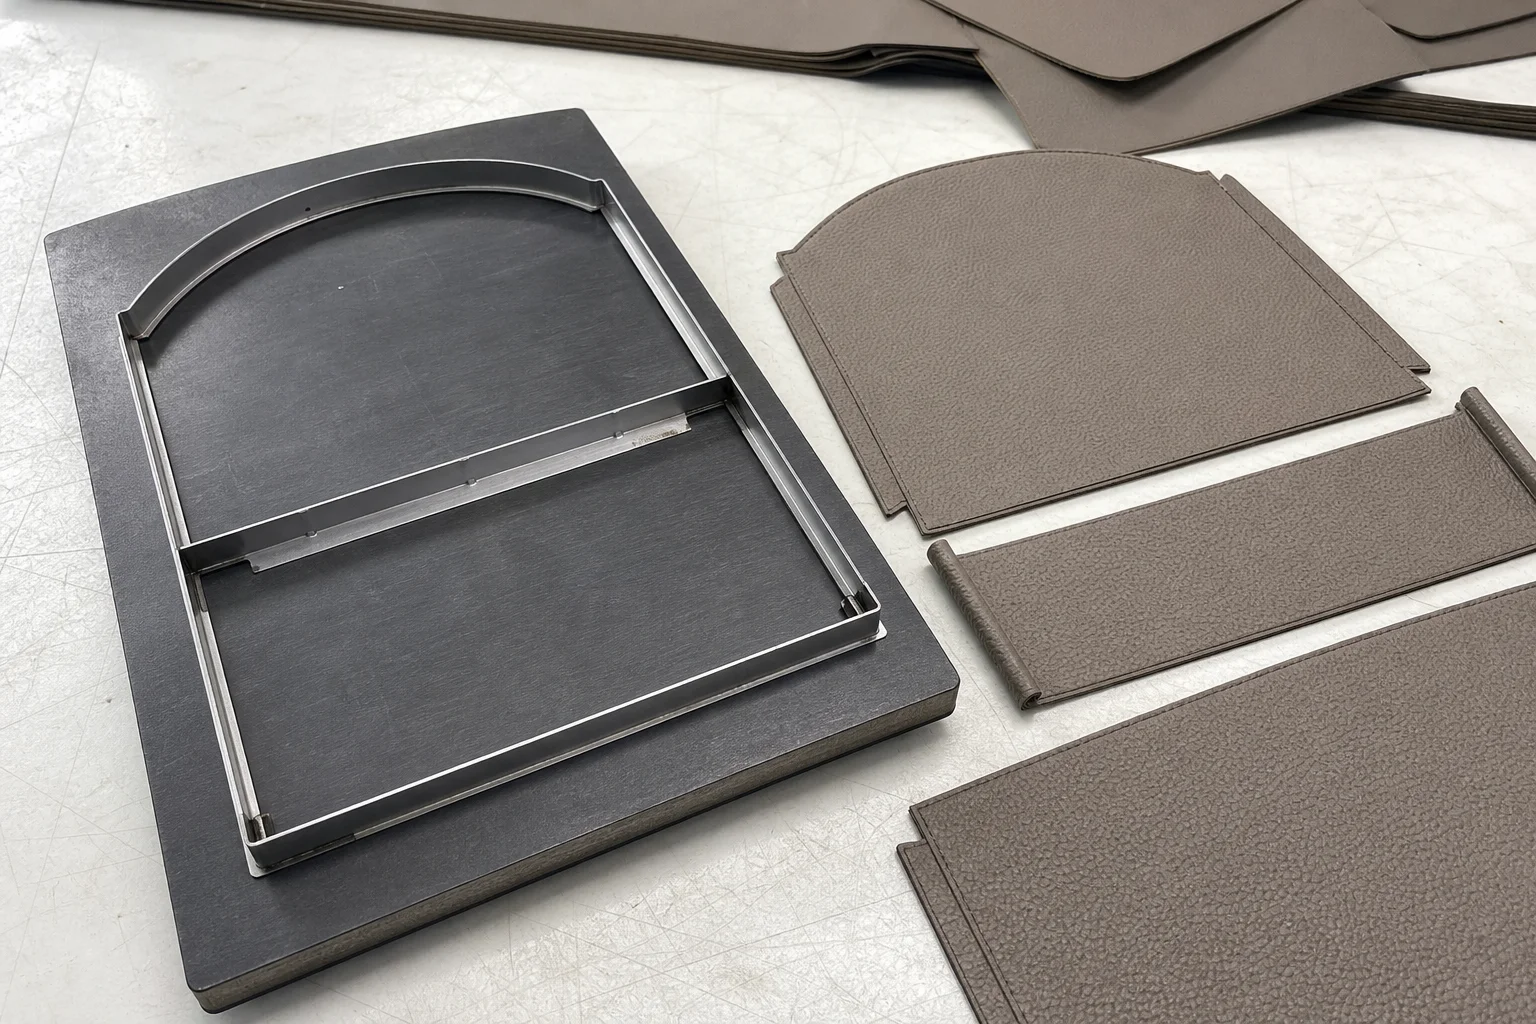
A steel blade is bent to the outline of each panel and set into a wooden or plastic base. The die is pressed onto stacked material to cut many pieces at once.
Simple shapes need simple dies. Complex curves, tight internal corners and small cut-outs increase the bending work and the risk of blade deformation.
Die cost drivers
Cost follows perimeter length, shape complexity, number of panels and die size. A large die that cuts a whole bag body costs more than a small die for a pocket flap.
Adding a design change after the die is made means either modifying it, which weakens the blade, or making a new one.
When dies are worth it
Dies pay back through faster cutting, consistent shapes and less material waste. On orders in the hundreds they may not be justified; on orders in the thousands they usually are.
Some factories cut by hand or with a computer-controlled cutter for small runs, which avoids die cost at the price of slower production and slightly less consistency.
| Cutting method | Tooling needed | Best volume | Trade-off |
|---|---|---|---|
| Hand cutting | None | Sampling, very small runs | Slow, variable accuracy |
| Digital knife cutting | None or minimal | Small to medium | Slower than die cutting |
| Steel cutting die | One die per panel | Medium to large | Fixed cost, high consistency |
| Progressive die | Complex multi-stage die | Large, simple shapes | High cost, high speed |
Die storage and handling
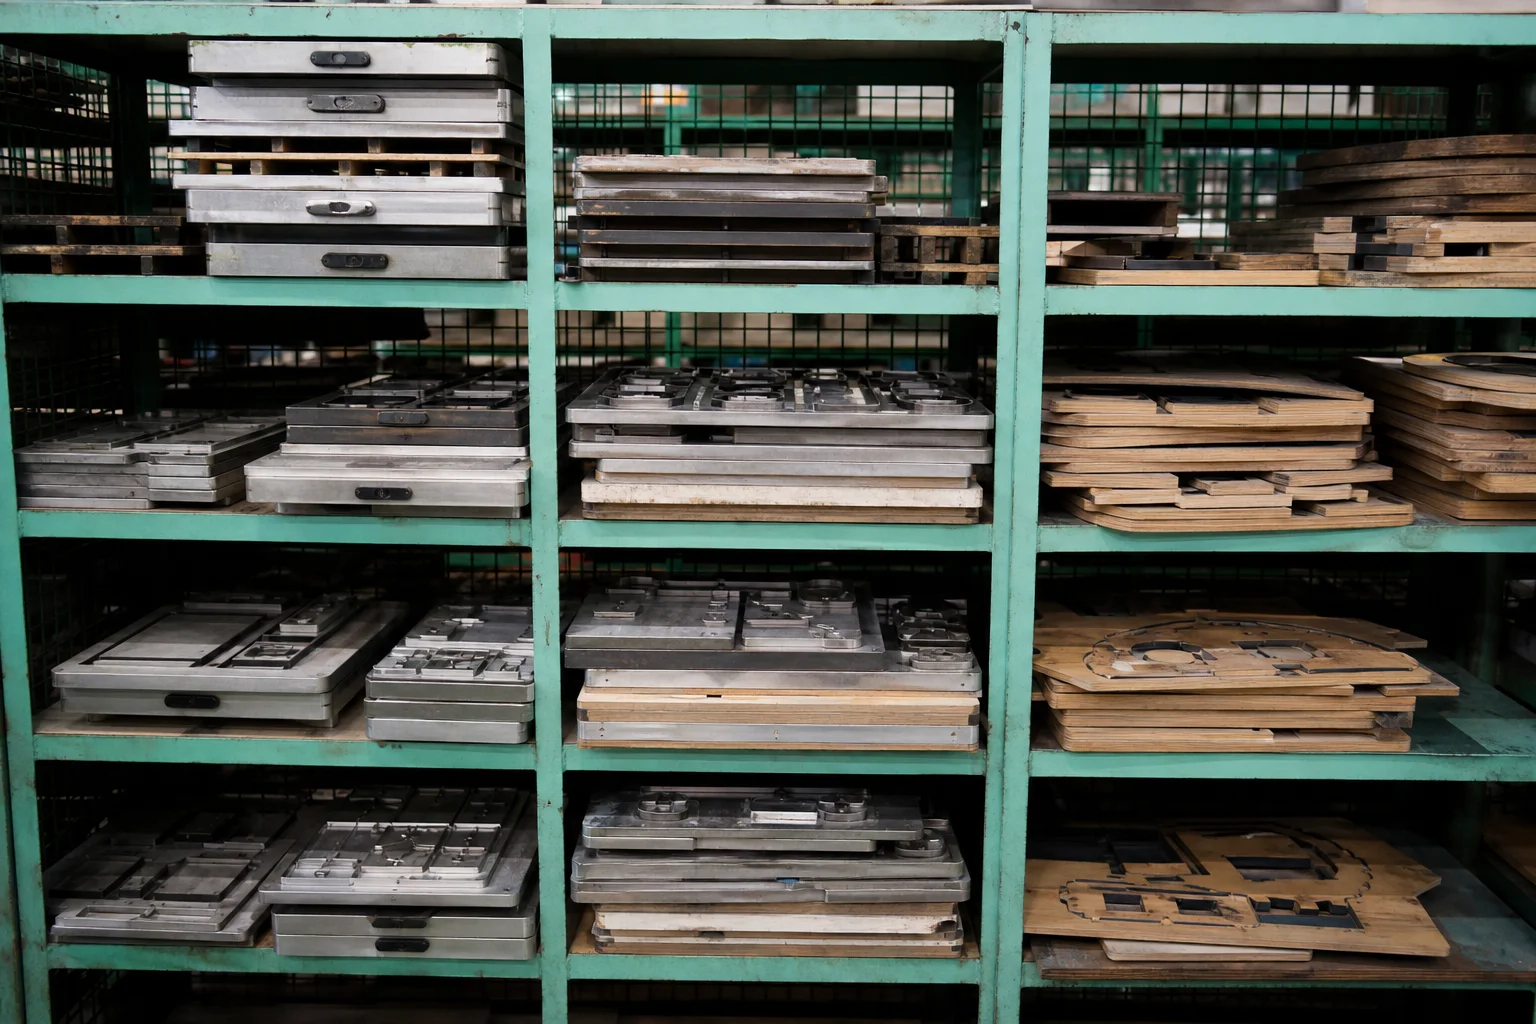
Dies are heavy and easily deformed if stacked badly. A factory that stores them upright on racks and labels them by customer produces cleaner cuts than one that piles them on the floor.
When a die is dropped or stored under load, the blade deforms slightly and the cut becomes ragged along one section.
Die maintenance
Dies wear and blades dull. A factory that tracks die condition produces cleaner cuts and fewer rejects. A neglected die starts tearing material at corners.
Sharpenings are usually included in the factory’s own cost, but a die that has been modified repeatedly may need replacing sooner than expected.
Embossing Plates and Grain Tooling
Embossing adds texture or a logo to the surface, and the plate that does it is a significant tooling item.
Grain plates versus logo plates
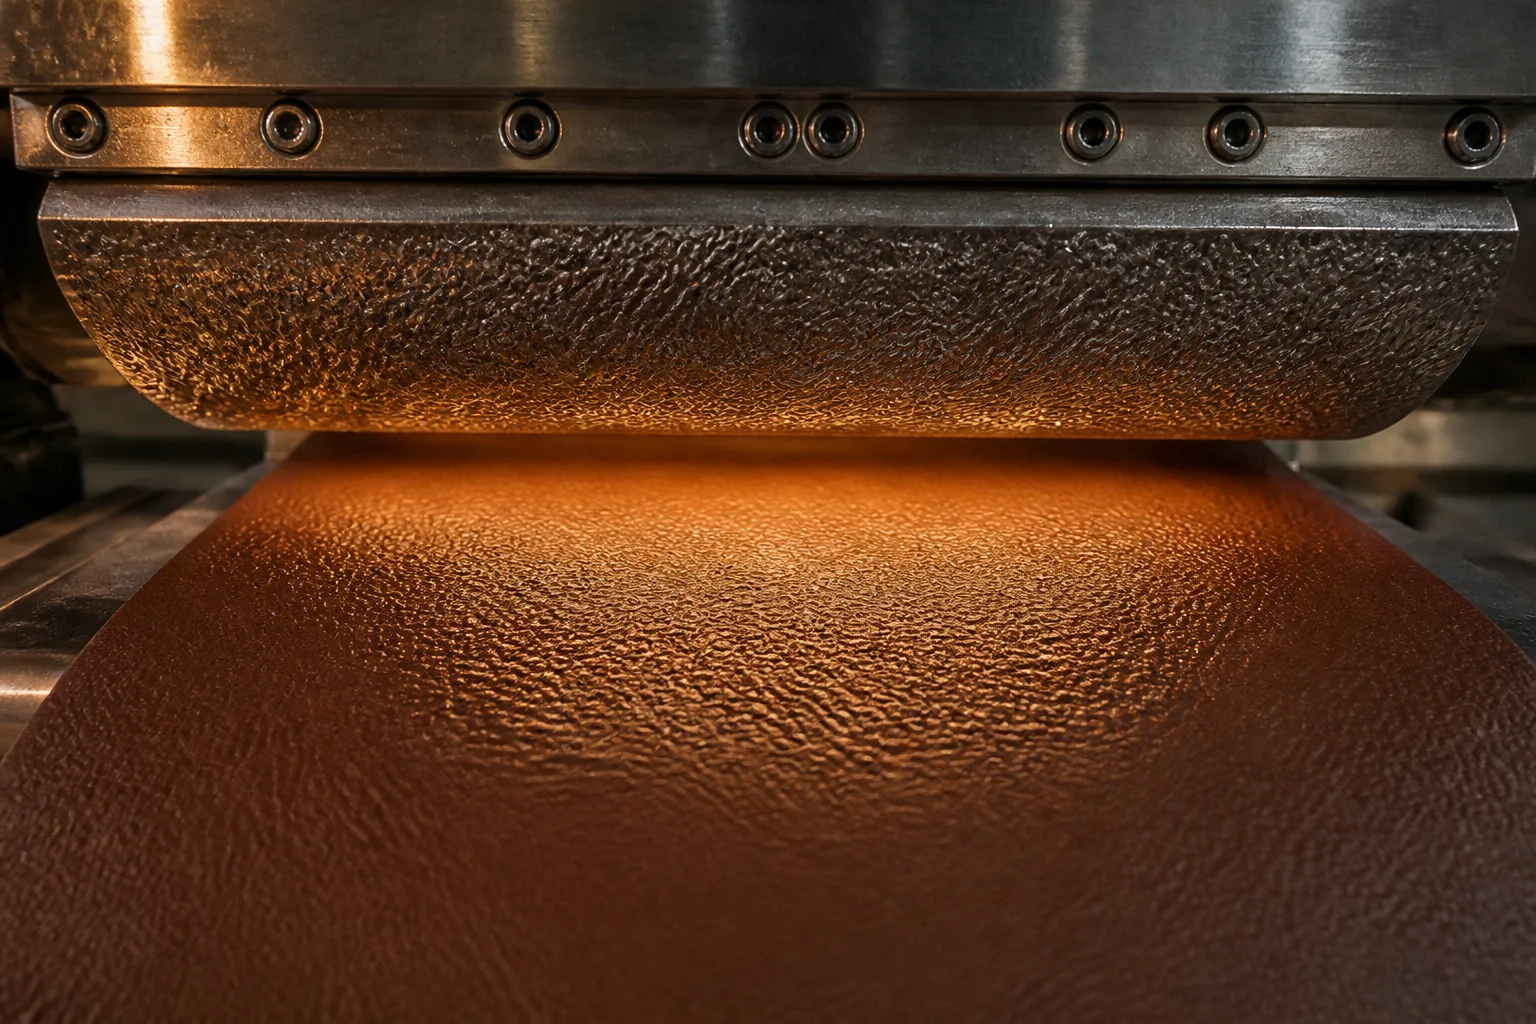
A grain plate covers the whole surface and creates a repeating texture. It is expensive because the pattern must be continuous and consistent across the full area.
A logo plate is smaller and localised, and costs less because it covers a defined area rather than a whole panel.
How the plate is produced
The pattern is engraved or etched into a metal plate, which is then mounted in a heated press. Fine detail requires finer engraving, which costs more and wears faster.
Deep embossing needs a more robust plate, while shallow effects can use a lighter one.
Existing patterns versus new ones
Most factories hold a library of standard grain patterns. Using an existing pattern avoids plate cost entirely, which is the single largest saving available on embossed designs.
A new pattern is justified when the texture is a brand signature, not when it is a variation on pebbled grain that already exists.
| Embossing item | Cost level | Best used when | Notes |
|---|---|---|---|
| Existing grain pattern | No tooling | Texture is not brand-critical | Fastest route to production |
| New grain plate | High | Signature texture | Full-panel coverage |
| Logo plate | Moderate | Brand mark on panels | Localised area |
| Fine-detail plate | Moderate to high | Small text or fine lines | Wears faster |
| Multi-level plate | High | Depth variation | Complex engraving |
Plate life and re-engraving
Embossing plates wear with use, and the pattern softens gradually. On long programs the effect becomes visible as a loss of definition between the first and last production runs.
Some factories re-engrave a worn plate, others replace it. The cost belongs in a repetition budget rather than a first-order quotation.
Sampling before committing
An embossing plate should not be made until the effect has been trialled on the actual material. Coating thickness and backing hardness change how a pattern reads.
Approving a plate from a paper proof is a common and expensive mistake.
Hardware Moulds and Custom Parts
Custom hardware is the category where tooling costs escalate fastest, because metal moulds are expensive and slow to make.
Catalogue versus custom
Catalogue hardware requires no tooling and is available in standard finishes. Custom hardware requires a mould, and the mould cost is charged before production begins.
For most bags, catalogue hardware is adequate. Custom hardware is justified when the fitting is a visible brand element or when no standard part meets the functional requirement.
Die casting and stamping
Die casting uses a steel mould and suits complex three-dimensional shapes. Stamping uses a simpler tool and suits flat parts such as plates and rings.
Both have minimum economic quantities, below which the mould cost per unit becomes disproportionate.
Minimum quantities for custom parts
Moulds set a practical floor on order size. Below that floor the mould cost per unit stops making sense, and the factory will usually say so.
If a design needs a custom part on a small order, buying a catalogue part and adding a branded element elsewhere is usually the better trade.
Finishing and plating
Custom parts also need finishing, which may require jigs for consistent plating or coating. These are smaller costs but they extend lead time.
A custom part is rarely just a mould. It is a mould, a finishing setup and an approval cycle.
| Hardware route | Tooling | Lead time impact | Best fit |
|---|---|---|---|
| Catalogue part | None | Minimal | Most bags |
| Catalogue part, custom finish | Small jigs | Moderate | Brand colour alignment |
| Stamped custom plate | Moderate | Moderate | Flat logo plates |
| Die-cast custom part | High | Long | Signature fittings |
| Machined prototype | None but costly per unit | Moderate | Pre-mould validation |
The approval loop
Custom hardware typically needs a physical sample approved before mass production. That sample may be machined rather than moulded, and it adds a round of shipping and review.
Budgeting time for that loop matters as much as budgeting the mould cost itself.
Printing Screens, Plates and Labels
Printing tooling is usually the smallest category, but it multiplies quickly when a design uses several colours or several label designs.
Screen printing
Each colour needs its own screen. A two-colour logo requires two screens, and a four-colour design requires four.
Screens are inexpensive individually and add up across colours and locations. The same screen can serve several products if the artwork is identical.
Heat transfer and labels
Heat transfer prints need a transfer plate or a digital setup, and woven labels need a loom program. Both are one-time costs tied to the artwork.
Label tooling is often overlooked because labels feel like consumables. They are consumables, but their artwork setup is not.
Colour matching cost
Matching a specific brand colour may require a custom ink mix and an approval round. That is not strictly tooling, but it behaves like it: a one-time cost tied to one design.
| Printing item | Tooling per design | Scales with | Reuse |
|---|---|---|---|
| Screen print | One screen per colour | Number of colours | Reusable until damaged |
| Heat transfer | Plate or digital setup | Artwork complexity | Reusable |
| Woven label | Loom program | Weave complexity | Reusable |
| Printed label | Plate per colour | Colours and size | Reusable |
| Custom ink match | Mix and approval | Colour accuracy demand | Per colour |
Where printing tooling is wasted
Screens and plates made for artwork that then changes are wasted cost. Approving artwork before tooling is cut is the simplest control available.
On multi-colour designs, confirming colour order and registration on a trial print prevents a second set of screens.
Sewing Jigs and Templates
Jigs are the least discussed tooling category and often the most valuable for consistency.
What a jig does
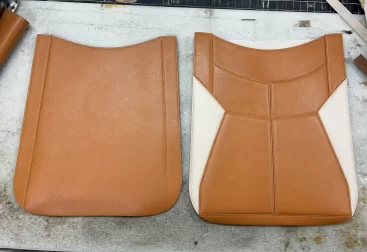
A jig holds a panel in a fixed position so that a stitch line lands in the same place on every piece. Templates guide the operator’s path along curves and corners.
Without them, stitch placement depends on operator judgement, which varies between people and between shifts.
When jigs are essential
Jigs matter most where a stitch line is visually prominent, where two panels must align precisely, or where a decorative pattern must repeat.
On a bag with contrast stitching, a jig is not a luxury. It is the difference between a clean line and a visible wobble.
Cost and lead time
Jigs are usually made in-house from acrylic, plywood or metal, and cost far less than dies or moulds. Lead time is measured in days rather than weeks.
Because they are cheap, they are the first thing a factory will skip when a schedule tightens, which is worth watching on a demanding design.
| Jig type | Purpose | Cost level | Quality impact |
|---|---|---|---|
| Stitch template | Guides needle path | Low | Consistent spacing |
| Panel positioner | Fixes alignment | Low | Accurate joins |
| Fold guide | Controls fold width | Low | Even edges |
| Bartack fixture | Locates reinforcement | Low to moderate | Repeatable strength |
| Assembly frame | Holds bag during final sewing | Moderate | Fewer distortions |
Why jigs are worth requesting
Asking whether jigs will be used is a useful quality question. A factory that plans them has thought about repeatability; one that dismisses them is relying on operator skill alone.
On a first order with a new design, that distinction shows up in the inspection report.
How Tooling Is Quoted and Amortised
Tooling can be quoted in three ways, and each has different cash-flow and accounting consequences.
Charged separately, paid upfront
The clearest arrangement. Tooling is listed as a line item, invoiced before production, and the unit price covers only material and labour.
This makes comparison easy and keeps the unit price honest. It also means the buyer funds the tooling before receiving goods.
Amortised into the unit price
The tooling cost is divided across the order quantity and folded into the unit price. Cash flow is easier, but the unit price no longer reflects production cost.
If the order is later reduced, the amortisation breaks and the factory either absorbs the difference or renegotiates. This is a common source of dispute.
Shared or waived
Some factories waive tooling on large orders or spread it across a committed program. The tooling cost does not disappear; it is recovered through volume or through a higher unit price.
A waived tooling charge is worth questioning, because it usually means either a longer commitment or a margin built in elsewhere.
| Arrangement | Cash flow | Comparison clarity | Risk |
|---|---|---|---|
| Separate, upfront | Buyer pays early | High | Working capital tied up |
| Amortised | Spread over units | Low | Order reduction breaks it |
| Waived on volume | None visible | Low | Hidden in unit price |
| Milestone linked | Paid at approval | High | Depends on milestone clarity |
How to compare quotations
Convert every quotation to a first-order total: tooling plus unit price times quantity. That number is the only fair basis for comparison.
Then check what each quotation includes, because one may omit embossing plates or printing screens that the other includes.
What Drives Tooling Cost Up
Tooling cost is not arbitrary. It follows a small number of predictable factors.
Design complexity
Curves, tight corners, small cut-outs, multiple panels and layered constructions all add tooling. Each additional panel needs its own die.
Simplifying a design at the sketch stage is the cheapest way to reduce tooling, because nothing has been cut yet.
Number of variants
Tooling multiplies across sizes and colourways where a panel shape changes. Three sizes of one bag can mean three sets of dies.
Where sizes differ only in width, some panels can share a die. Designing for shared tooling is a deliberate cost decision.
Material and process demands
Deep embossing, tight-tolerance printing and custom metal finishes all push tooling cost up, because each requires more precise equipment.
Specifying a standard grain and a catalogue fitting can remove whole categories of tooling at no cost to the design intent.
| Driver | Effect on tooling | Control |
|---|---|---|
| Design complexity | Higher die count and cost | Simplify at sketch stage |
| Number of sizes | Multiplies dies | Share panels across sizes |
| Colourways | Multiplies printing screens | Limit colours per design |
| Custom hardware | Adds moulds | Use catalogue parts |
| New grain pattern | Adds plate cost | Use existing library |
| Late changes | Re-makes tooling | Freeze design before cutting |
Currency and quotation validity
Tooling is usually quoted as a fixed amount and paid early, so currency movement between quotation and payment has a small but real effect.
Confirming whether the tooling quotation holds for thirty days or ninety avoids a quiet revision when the order is placed.
The cost of changing your mind
Tooling is unforgiving of late decisions. A change after dies are cut means modification or replacement, and modification shortens die life.
Most tooling disputes trace back to a design change made after approval, not to a factory overcharging.
Approving Tooling Before Mass Production
Tooling approval is a short stage with a large effect on the rest of the order. It confirms that the equipment produces what the design intended, before volume is committed.
What a tooling trial should show
A trial run on the finished tooling should demonstrate clean cutting without frayed edges, even embossing without ghosting or flattening, and stitch lines that follow the jig consistently.
It should also show the bag assembled, because tooling that works panel by panel can still produce a bag that does not close cleanly.
Measurements worth recording
Panel dimensions, stitch margins, emboss depth and hardware hole positions are the four measurements that reveal tooling drift. Recording them at trial gives a baseline for later orders.
Without that baseline, a slow drift across repeat orders is invisible until a customer notices a fit problem.
Who signs off
The buyer should sign off on the physical sample, not on photographs. Colour, texture and stitch quality all read differently on a screen.
A written approval with photographs attached protects both sides if a later dispute arises about what was agreed.
Common approval failures
Approving a trial made before the final tooling is complete, accepting a sample cut by hand instead of by die, and approving embossing on a different material from the production material are the three recurring errors.
Each is easy to prevent and expensive to discover during mass production.
| Approval check | What to verify | Failure if skipped |
|---|---|---|
| Cut quality | Clean edges, no fraying | Rework across the run |
| Emboss quality | Even depth, no ghosting | Visible surface defects |
| Stitch alignment | Consistent margin | Wavy visible seams |
| Assembly fit | Bag closes and sits square | Distortion in finished goods |
| Material match | Trial on production material | Effect differs at scale |
| Recorded measurements | Baseline for repeat orders | Undetected drift later |
Why the trial is the cheapest insurance in the order
A trial run costs a small number of bags and a few days. A tooling fault discovered during mass production costs the affected units, the replacement tooling and the delivery date.
The arithmetic is not close, which is why a compressed schedule should compress something else first.
Ownership, Storage and Reuse
Who owns the tooling is a question worth settling at the quotation stage rather than at the end of a relationship.
Who owns it
If the buyer pays for tooling, the buyer should own it. That means the tooling can be moved to another factory, or reclaimed if the relationship ends.
Ownership should be stated in writing. Without it, possession is the default position, and a factory holding the dies has practical control.
Storage and condition
Dies and plates take space and need protection from rust and deformation. Most factories store customer tooling at no charge while orders continue.
After a long gap, tooling may need inspection before reuse. A die stored badly can be distorted, and a plate can corrode.
Reuse across orders
Tooling made for one order serves repeat orders at no additional cost. That is the whole point of the investment, and it is why the second order is always cheaper per unit.
If a factory asks for tooling again on a repeat order of an unchanged design, that is worth questioning.
| Question | Good answer | Warning sign |
|---|---|---|
| Who owns the dies? | Buyer, stated in writing | Vague or evasive |
| Where is it stored? | Factory store, catalogued | No record kept |
| Repeat order cost | No tooling charge | Tooling charged again |
| Condition after a gap | Inspected before use | Used without checking |
| Transfer to another factory | Permitted | Blocked or charged |
Retrieval and transfer
Moving tooling between factories is possible but rarely cheap, because dies are heavy and plates are delicate. The cost often exceeds the tooling value for small items.
Ownership still matters, because it affects negotiating position even when transfer is impractical.
When Tooling Is Not Needed
A significant share of bag designs need no tooling at all beyond cutting, and some need none.
Stock shapes and standard panels
Designs built from standard panel shapes can be cut without custom dies. The trade-off is less design freedom and slightly slower production.
For a first order testing a market, this is a sensible way to avoid capital commitment.
Existing patterns and catalogue hardware
Using a factory’s existing grain patterns and catalogue hardware removes the two largest tooling categories. The design still looks finished; it simply uses proven components.
Digital printing and cutting
Digital printing needs no screens, and computer-controlled cutting needs no dies. Both cost more per unit and less upfront, which suits small runs.
The crossover point depends on volume and design complexity, and it is worth asking the factory to calculate it rather than estimating.
| Design choice | Tooling avoided | Trade-off |
|---|---|---|
| Standard panel shapes | Cutting dies | Less design freedom |
| Factory grain pattern | Embossing plate | Texture not unique |
| Catalogue hardware | Hardware mould | Limited finish options |
| Digital print | Printing screens | Higher unit cost |
| Single size launch | Multi-size dies | Narrower range |
The strategic use of a no-tooling first order
A first order without tooling lets a buyer test demand at low capital risk. If the design sells, tooling follows on the second order with confidence.
That sequence costs slightly more per unit on the first run and avoids writing off tooling for a design that does not work.
Reducing Cost Without Losing Quality
Tooling can be reduced substantially without compromising the product, provided the reductions target the right items.
Simplify geometry before cutting
Replacing a complex curve with a slightly simpler one can reduce die cost significantly. The visual difference is often invisible once the bag is assembled.
Share panels across sizes
Designing sizes so that several panels are common removes dies from the tooling list. This is a design decision with a direct cost consequence.
Use existing patterns and catalogue parts
The largest savings come from categories a buyer does not need to own. A standard grain and a catalogue buckle can look entirely appropriate on a well-designed bag.
Invest where it shows
Spend tooling on the elements a customer will notice: a signature emboss, a distinctive fitting, a clean cut on a visible edge. Save it on internal panels and hidden structures.
| Reduction tactic | Saving | Quality risk | Recommendation |
|---|---|---|---|
| Simplify curves | Moderate | Low | Do it at sketch stage |
| Share panels | Moderate to high | Low | Design for it early |
| Existing grain | High | Low | Default choice |
| Catalogue hardware | High | Low to moderate | Unless brand-critical |
| Skip jigs | Low | High | Not recommended |
| Fewer colours | Moderate | Low | Where design allows |
Skipping jigs saves the least and costs the most. They are the cheapest tooling item and the one most directly tied to whether the bag looks well made.
What not to cut
Cutting dies on a high-volume program usually costs more in labour and waste than it saves. Cutting jigs on a visible stitch line shows immediately in the finished goods.
The savings worth taking are in categories the customer never inspects, not in the ones they do.
Tooling in the Order Timeline
Tooling takes time, and placing it correctly in the schedule is what keeps a delivery date realistic.
Sequence from approval to production
Design approval comes first, then tooling manufacture, then trial production, then approval of the trial, then mass production. Tooling sits between design and trial, and nothing moves until it is ready.
A schedule that assumes tooling happens in parallel with material preparation will slip if the tooling is complex.
Typical lead times
Cutting dies are usually measured in days to a couple of weeks. Embossing plates and hardware moulds take longer, and custom die-cast parts can take several weeks including sample approval.
These are planning ranges, not commitments. The factory’s own estimate for the specific design is the number to use.
Why trial production is not optional
New tooling rarely performs perfectly on the first run. Trial production reveals whether the die cuts cleanly, whether the plate embosses evenly and whether the jig holds alignment.
Skipping the trial to save a week usually costs more than a week in rework.
| Stage | What happens | Typical duration | Risk if rushed |
|---|---|---|---|
| Design freeze | Drawings and materials fixed | Buyer dependent | Tooling rework |
| Tooling manufacture | Dies, plates, moulds made | Days to weeks | Poor fit or finish |
| Trial production | Sample run on real tooling | Days | Defects found late |
| Trial approval | Buyer sign-off | Days | Rework after start |
| Mass production | Full run | Weeks | Schedule compression |
Where tooling sits relative to material ordering
Material can usually be ordered while tooling is being made, provided the specification is frozen. That overlap is where schedule time is genuinely recovered.
What cannot overlap is the trial run and the approval before mass production, because both depend on the finished tooling.
Planning backwards from the delivery date
Working backwards from the required delivery date is the most reliable way to schedule tooling. If the arithmetic does not fit, the design or the date has to change.
Discovering that at the tooling stage is far cheaper than discovering it at the loading dock.
FAQ
How much does tooling typically add to a first bag order?
It depends entirely on the design. A simple bag using standard panels, an existing grain and catalogue hardware may need only cutting dies. A bag with custom embossing, custom metal fittings and multi-colour printing can carry several tooling categories at once. Ask for an itemised tooling list rather than a single figure.
Is tooling a one-time cost?
Yes, for an unchanged design. The same dies and plates serve repeat orders. If a design changes, expect modification or replacement, and modification shortens die life.
Do I own the tooling I pay for?
You should, and it should be stated in writing at the quotation stage. Ownership affects your ability to move production later, even where physically transferring heavy dies is impractical.
Can tooling costs be amortised into the unit price?
Yes, and some factories prefer it. It eases cash flow but obscures the true unit cost and creates a problem if the order quantity is later reduced. Separate upfront charging is easier to compare.
Why is tooling charged again on a repeat order?
It should not be, for an unchanged design. If it is, ask whether the original tooling was damaged, lost, or never actually made. This is a reasonable question and a useful signal.
Can I avoid embossing plate costs?
Use an existing grain pattern from the factory’s library. This removes the largest single tooling item on embossed designs. A new plate is worth it only when the texture is a genuine brand signature.
Are cutting dies always necessary?
No. Small runs can be hand cut or digitally cut without dies. Dies become worthwhile as volume rises, because they speed production and improve consistency.
What are sewing jigs and do I need them?
Jigs hold panels in position so stitch lines land consistently. They cost little and matter most where stitching is visible or panels must align precisely. They are usually the first item skipped when schedules tighten, which is worth watching.
How long does tooling take to make?
Cutting dies usually take days to a couple of weeks. Embossing plates and hardware moulds take longer, and custom die-cast parts can take several weeks including sample approval. Always use the factory’s estimate for your specific design.
What happens to tooling if I stop ordering?
Most factories store customer tooling at no charge while orders continue. After a long gap, ask for its condition to be checked before reuse, since dies can distort and plates can corrode in storage.
Can tooling be moved to another factory?
It can, if you own it and the factory cooperates. In practice, freight and handling often cost more than the tooling is worth for small items. Ownership still affects your negotiating position.
How do I compare quotations that treat tooling differently?
Convert each to a first-order total: tooling plus unit price multiplied by quantity. Then check what each quotation includes, because one may omit printing screens or embossing plates that the other lists.
Planning a first order and want the tooling list itemised before you commit?
Send your design drawings and target quantity to info@gionar.com and we will set out which tooling your design needs, what can be avoided, and where the money is best spent.