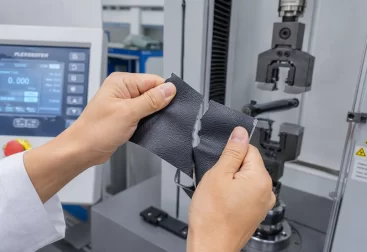
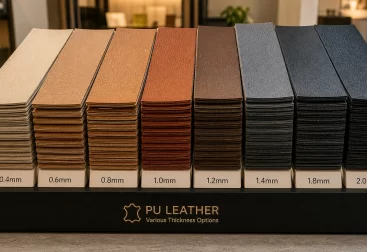
Most bag failures that reach a customer are not mysterious. A handle anchor pulls out. A strap separates at the point where it meets the body. A zipper splits under a loaded bag. In each case the failure occurred at a specific point under a specific load that nobody tested before the order was placed.
Load testing is the cheapest insurance available to a bag buyer. It costs a sample, a morning of time and a simple record sheet, and it converts a set of assumptions about strength into measured results. Yet it is routinely skipped, because the bag looks solid, the factory has made similar products before, and the order is already behind schedule.
The consequence of skipping it is predictable. A construction that appears adequate when a bag is empty or lightly filled can deform, distort or fail once it carries the weight it was designed for. These failures typically appear in the first weeks of use, which means they land on the customer rather than on the factory.
This guide sets out what load testing should prove, which load cases every bag must survive, how to test carry points, closures and seams, how to set pass criteria, and how to run meaningful tests without access to a laboratory. It is written for buyers placing production orders, with the emphasis on tests that can be run before the line starts.
- What Load Testing Is Meant to Prove
- The Load Cases Every Bag Should Survive
- Testing Carry Points: Handles, Straps and Anchors
- Zipper and Closure Cycle Testing
- Seam and Material Strength Under Load
- Setting Test Levels and Pass Criteria
- Running Tests Without a Laboratory
- Recording Results and Using Them
- FAQ
What Load Testing Is Meant to Prove
Load testing answers a narrow question: does this construction survive the forces it will actually experience? It is not a general quality check and does not test appearance, finish or comfort.
Strength versus durability
These two properties are frequently confused. Strength describes how a bag behaves under a single heavy load. Durability describes how it behaves under repeated moderate load over time. A construction can be strong and not durable, or durable and not strong.
A stitched handle that holds two hundred kilograms once may still fail after thirty thousand normal lifts if the thread abrades against a raw edge. Conversely, a design that survives years of light use may fail immediately under a single over-loaded journey. Both properties need testing, with different methods.
Why pre-production testing matters most
Testing before production is where the value concentrates, because a failure discovered at that stage costs a design change. The same failure discovered after delivery costs a recall, a return programme and a damaged relationship.
The window is short. Once the line starts, changing an anchor reinforcement or a seam structure means stopping production. That is why the sample approval stage is the correct point to test, and why a sample that merely looks right is not sufficient approval.
What testing does not replace
Testing does not replace clear specifications, consistent production or inspection. A sample that passes a load test proves the design can work, not that every unit will be built to the same standard.
This distinction matters when interpreting results. Load testing de-risks the design; inspection de-risks the batch. Both are needed, and neither substitutes for the other.
| Property | What it measures | Test type |
|---|---|---|
| Strength | Behaviour under a single heavy load | Static load, pull test |
| Durability | Behaviour under repeated moderate load | Cycle testing |
| Abrasion resistance | Surface wear from contact | Rub or slip test |
| Seam integrity | Resistance to seam failure | Seam pull test |
| Closure endurance | Function after repeated use | Zip and closure cycling |
The commercial argument
Factories generally accept load testing when a buyer requests it, because the tests are simple and the sample already exists. The resistance usually comes from schedule pressure rather than from the factory’s reluctance to test.
Building testing into the sampling calendar, rather than treating it as an extra step after approval, removes most of that pressure. A sample round that includes a load test costs a few days and prevents the disputes that consume weeks.
Testing before the price is finalised
There is a commercial argument for testing early that is often overlooked. A construction change required to pass a load test usually costs money, and a change made after the price is agreed becomes a negotiation.
Testing before the quotation is confirmed turns the extra reinforcement into a costed line item rather than a disputed extra. It also prevents the common outcome in which the reinforcement is quietly omitted to protect the agreed price.
The Load Cases Every Bag Should Survive
Before testing can be designed, the loads need to be defined. A bag meets several distinct load cases in normal use, and each stresses a different part of the construction.
Static carry load
The static case is the simplest: the bag filled to its intended capacity and carried normally. The relevant figure is not the bag’s volume but the realistic weight of its contents, plus a margin for the heavier days.
For a laptop backpack, the contents may reach eight to ten kilograms. For a tote used for shopping, the load can exceed that. The margin should reflect the fact that users routinely exceed the intended capacity.
Dynamic and shock load
Carrying a bag involves more than a steady load. Walking produces a cyclic vertical load, and setting a bag down, swinging it onto a shoulder or catching it as it falls produces a shock load that can be several times the static weight.
Shock is where anchors fail in practice. A bag that holds ten kilograms steadily may fail when the same ten kilograms lands abruptly on one handle. Testing should therefore include a dropped or sudden-release case rather than static load alone.
Asymmetric and single-point loading
Users carry bags by one handle, one strap, or a single attachment point far more often than by both handles evenly. Single-point loading concentrates the entire weight on one anchor and one seam run, and it is the most common cause of handle failure.
A test that loads both handles evenly can pass comfortably while the bag fails immediately when carried by one. Every carry point should be tested individually, not only in combination.
| Load case | What it stresses | Why it matters |
|---|---|---|
| Static carry | All anchors and seams | Baseline integrity |
| Dynamic walking | Anchor fatigue | Repeated real use |
| Shock or drop | Anchor and stitch peaks | Peak loads exceed static |
| Single-point carry | One anchor at a time | Most common real practice |
| Over-capacity | Seams and base | Users exceed intended load |
| Packed and dropped | Base and corner structure | Protects contents |
Contents protection as a load requirement
For bags carrying laptops, cameras or instruments, the load case includes protecting the contents from impact. This shifts some testing attention from the carry point to the base and the corner structure.
A drop test with a representative weight inside reveals whether the base padding compresses fully, whether the corners transmit impact, and whether a laptop sleeve actually spreads the load. This is difficult to judge by inspection alone.
Temperature and humidity effects
PU leather and coated fabrics behave differently as temperature changes. A material that is flexible and tough in a mild workshop can become stiff and brittle in cold conditions, which changes how it distributes load at an anchor.
For products destined for cold or hot markets, testing at ambient workshop temperature alone gives an incomplete picture. Conditioning a sample in a cold room or a warm cabinet before testing is a simple way to check whether performance changes materially.
Testing Carry Points: Handles, Straps and Anchors
Carry points are the most common failure location in every bag category, and they are the easiest to test. The relevant question is not whether the handle looks strong, but how the load travels from the handle into the bag body.
The load path
A handle load passes through several elements in sequence: the handle material, the stitching that joins it to the panel, the panel material, and any reinforcement behind the panel. The weakest element in that chain determines the strength of the whole.
In practice the panel is often the weakest link, not the handle. A strong webbing handle stitched to an unreinforced PU leather panel will simply tear the panel, which is why reinforcement at the anchor is the critical design decision.
How to run a pull test
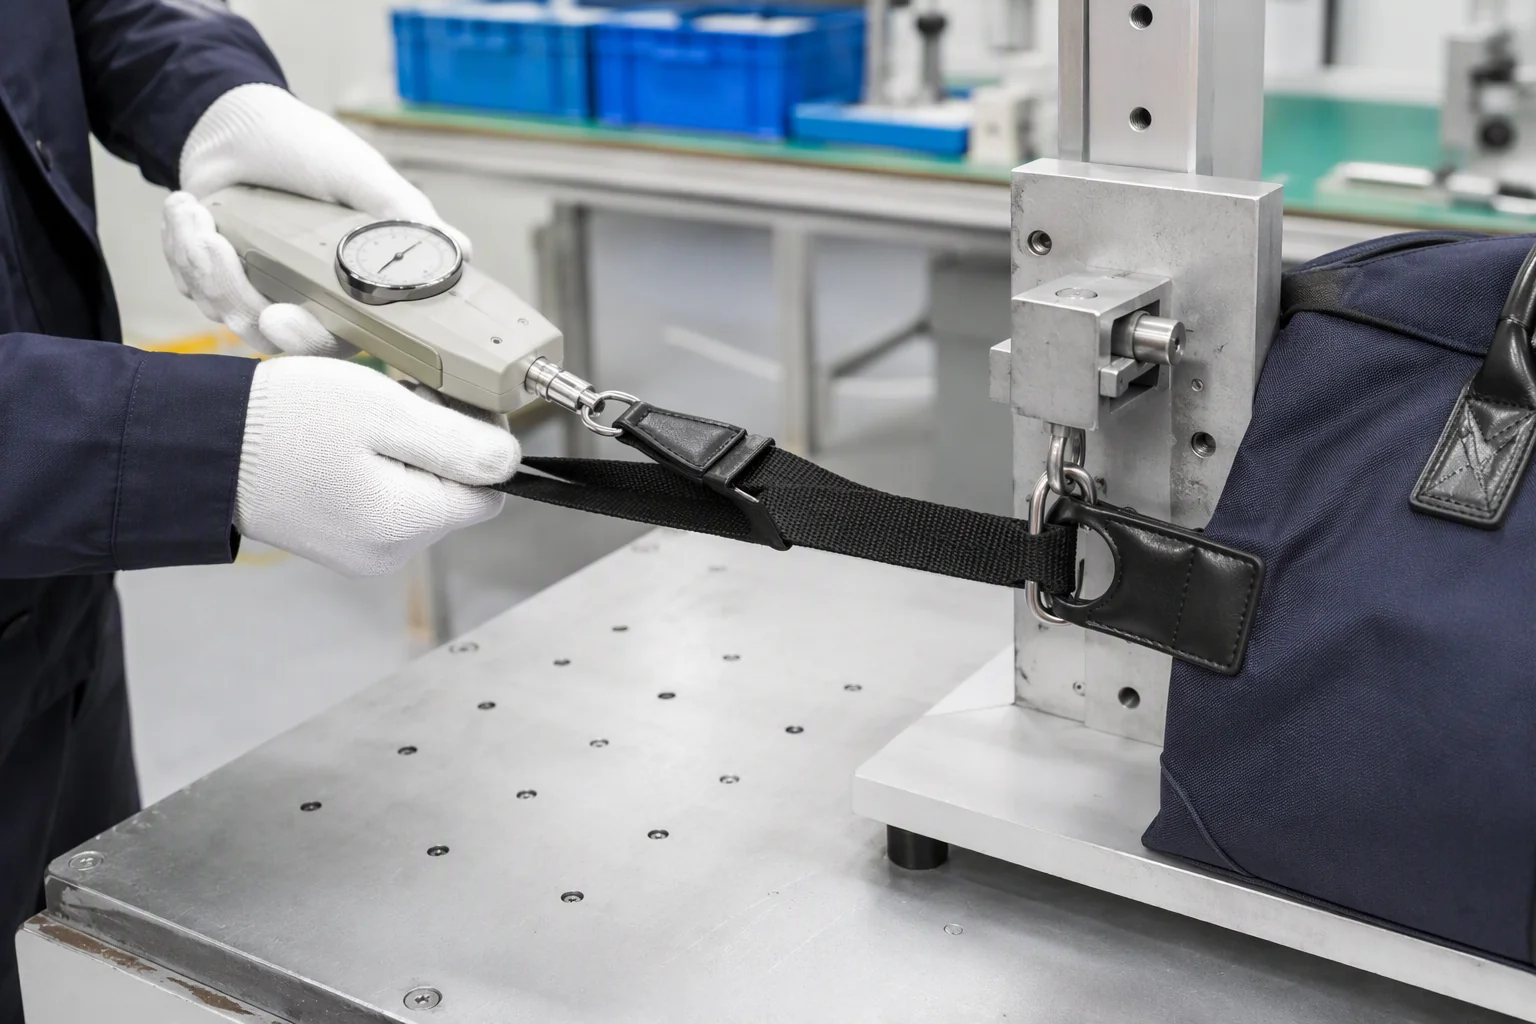
A pull test applies load to a single carry point until a defined target is reached or failure occurs. It can be done with a spring gauge or a simple weighted rig, and it should be applied gradually rather than suddenly so that the failure point can be identified.
Record the load at which the first visible change occurs — stitch elongation, panel distortion, or hardware deformation — not just the load at which the bag breaks. Early deformation is the warning sign that matters for a product in service.
What to inspect afterwards
After a test, examine the failure location rather than discarding the sample. Where the failure occurred tells you what to change, and the pattern is usually consistent across the batch.
| Failure location | What it indicates | Corrective direction |
|---|---|---|
| Thread breaks, panel intact | Thread too weak or stitch too short | Change thread or stitch length |
| Panel tears at stitch line | Insufficient reinforcement | Add backing or spread load |
| Hardware deforms or opens | Hardware underrated | Upgrade attachment component |
| Handle material stretches | Webbing or leather quality | Change handle material |
| Stitch pulls through panel | Stitch holes too close to edge | Increase seam allowance |
Adjustable and removable elements
Adjusters, sliders and clips introduce additional failure points that a simple handle test will miss. An adjustable strap should be tested at each end and at the adjuster itself, because the adjuster is often the weakest component in the assembly.
Removable straps deserve particular attention, since the clip and the ring it engages must both be rated above the load the bag will carry. A clip that opens under load causes an immediate and highly visible failure.
Test each carry point on its own. A bag that survives even loading can still fail on the first single-handle lift.
Zipper and Closure Cycle Testing
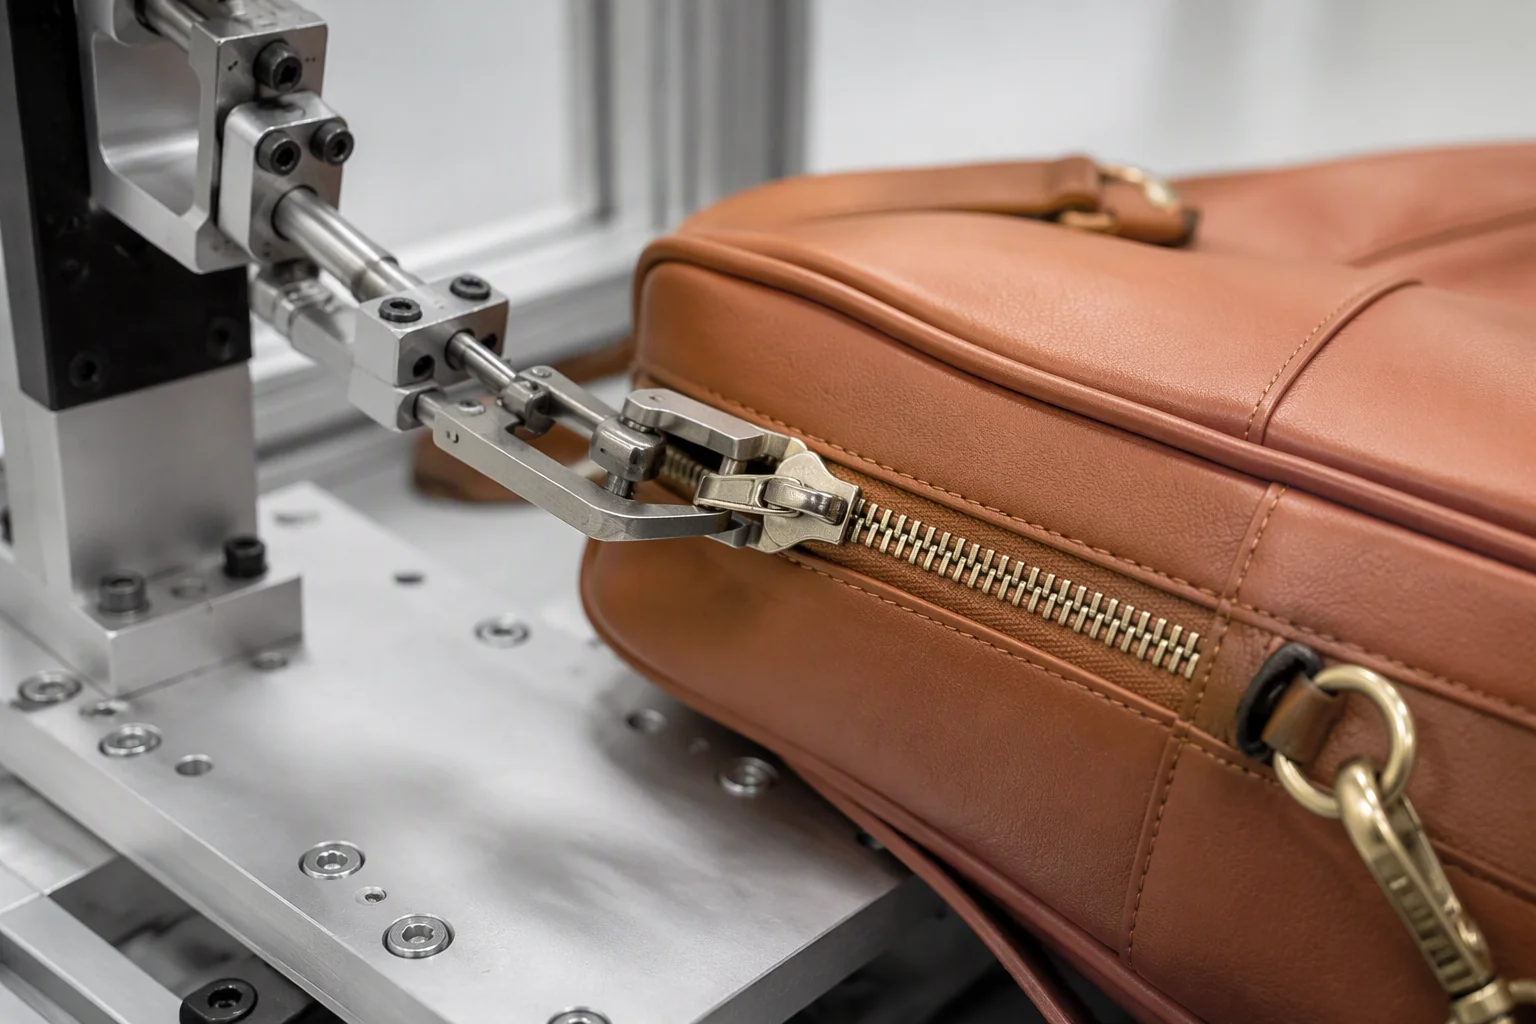
Zippers and closures fail through use rather than through load, so they are tested by repetition. A zipper that opens smoothly once will not necessarily survive a year of daily operation.
Why cycling reveals what inspection cannot
A new zipper feels identical whether its slider is well matched to the tape or slightly too tight. The difference appears only after several hundred cycles, when an ill-matched slider begins to skip teeth or the tape distorts at the curve.
Cycling also exposes the interaction between the zipper and the bag. A zip that runs around a tight corner, or one that takes the strain of a loaded bag, behaves differently from one tested flat and unloaded.
What to cycle, and how far
For a bag, the realistic cycle count should reflect the product’s expected life. A main compartment zip used several times a day over three years implies a substantial number of cycles, while an internal pocket zip sees far fewer.
Where a full endurance test is impractical before production, a shorter test still identifies gross problems. A few hundred cycles will reveal a mismatched slider, a distorted curve or a tape that separates from the panel.
Magnets, snaps and buckles
Magnetic closures should be tested for alignment and holding force, both empty and loaded. A flap that holds securely when the bag is empty can release under the weight of a full load if the magnet is under-specified or misaligned.
Snap fasteners and buckles should be opened and closed repeatedly and checked for cracking at the base, which is the typical failure of low-grade components. Buckle adjustment should be operated through its full range under load.
| Closure | Test method | Typical failure |
|---|---|---|
| Main zipper | Cycle loaded, full length | Slider skip, tape distortion |
| Internal zipper | Cycle unloaded | Teeth separation |
| Magnetic closure | Alignment and holding under load | Releases when loaded |
| Snap fastener | Repeated open and close | Cracking at base |
| Side release buckle | Cycle and adjust under load | Tab break, slips open |
| Drawstring or toggle | Repeated tension and release | Cord wear at exit |
Testing closures in the loaded state
The most informative closure test is a loaded one. A bag filled to its intended capacity puts the closure under tension it would not otherwise experience, particularly at the corners of a curved zip.
Testing loaded also reveals whether a closure can be operated conveniently when the bag is full, which is a functional requirement rather than a strength one but is equally likely to generate a complaint.
Closures after cleaning and treatment
Closures are often tested only on new samples, but many bags are cleaned or treated during their life. A zip tape that stiffens after wet cleaning, or a coating that migrates onto the teeth, can change how a closure performs.
For products likely to be cleaned by retailers or users, a simple test on a cleaned sample shows whether the closure still functions. It is a common source of complaints that no new-sample test will predict.
Seam and Material Strength Under Load
Seams carry every load in a bag, and they are where material choice and construction meet. Testing them requires attention to both the stitch and the material being stitched.
Stitch density and thread choice
Stitch density affects strength in a way that is not intuitive. Below a certain density the seam is weak because too few stitches share the load; above a certain density the material itself is perforated and tears between the holes.
Thread must also match the material. A heavy thread in a light material tears the material rather than holding, while a light thread in heavy material breaks first. The correct combination is the one where the seam fails only when the material itself fails.
Seam types and where they are used
Different seams suit different loads. A simple lap seam is adequate for a low-stress internal pocket. Load-bearing junctions such as handle attachments need a reinforced construction, typically a box-and-cross stitch or a bar tack over a folded reinforcement.
| Seam type | Where used | Load suitability |
|---|---|---|
| Plain lap seam | Internal pockets, linings | Light |
| Double-stitched seam | Body panels, gussets | Moderate |
| Box and cross stitch | Handle and strap anchors | High |
| Bar tack | Stress points, zip ends | High, localised |
| Bound or folded seam | Edges under abrasion | Moderate, wear resistant |
Material behaviour under sustained load
PU leather and coated fabrics can stretch under sustained load, a property that simple pull tests can miss because they apply force briefly. A bag left loaded for days may deform in a way that a short test does not reveal.
A long-duration test, even a simple one where the loaded bag is left hanging for a day or two, catches this behaviour. It is inexpensive and reveals problems that short tests consistently miss.
Abrasion at stitch and edge interfaces
Where a strap passes through a ring or a webbing edge contacts a rough surface, abrasion gradually reduces strength. Testing this properly requires cycling, but a visual check of edge finishing and ring smoothness catches the most common causes.
Test seams under the load they will actually carry, and load them for long enough for the material to respond.
Setting Test Levels and Pass Criteria
A test without a pass criterion is an observation, not a test. The criterion should be agreed before testing starts, because a criterion chosen after seeing a result is not a criterion at all.
Deriving the test load
The test load should be derived from the intended contents plus a margin. A common approach is to test at roughly two to three times the expected working load, on the basis that shock and over-capacity are normal rather than exceptional.
For a bag intended to carry five kilograms, testing at ten to fifteen kilograms is a reasonable working level. The exact multiple matters less than having a defensible number that both parties accept in advance.
Defining failure
Failure needs defining as precisely as the load. For a handle test, failure might be thread breakage, panel tear, hardware deformation or visible permanent elongation. Each is a different outcome with a different remedy.
Defining failure to include permanent deformation is important for bags, because a handle that stretches and does not recover will generate complaints even though nothing has broken.
| Criterion | Definition | What it catches |
|---|---|---|
| No rupture | No thread, panel or hardware failure | Immediate structural weakness |
| No permanent deformation | Returns to shape after load removed | Material and seam stretch |
| No hardware distortion | Components retain form and function | Underrated hardware |
| Function retained | Zips and closures still operate | Load-induced jamming |
| Appearance acceptable | No surface damage at load points | Cosmetic failure in use |
Matching criteria to the product and market
Criteria should reflect the market. A value line sold at a low price point can accept a lower test level than a premium product with a warranty, and a bag sold as luggage for air travel faces different loads from a fashion accessory.
Where a retailer or a certification scheme imposes its own requirements, those take precedence and should be identified before testing so the programme is designed to meet them rather than repeated afterwards.
Recording the agreed level before testing
The agreed load, method and pass criterion should be recorded in writing before the test is carried out, ideally as part of the sample approval document. This removes the ambiguity that appears when a result is borderline.
It also makes the test repeatable by a different party. If a supplier later disputes a failure, a written method allows the same test to be repeated independently and compared directly, rather than relying on recollection of what was done.
Running Tests Without a Laboratory
Most bag buyers do not have access to a testing laboratory, and most bag tests do not require one. A bench, some weights, a gauge and a record sheet cover the majority of cases.
Improvised but valid testing
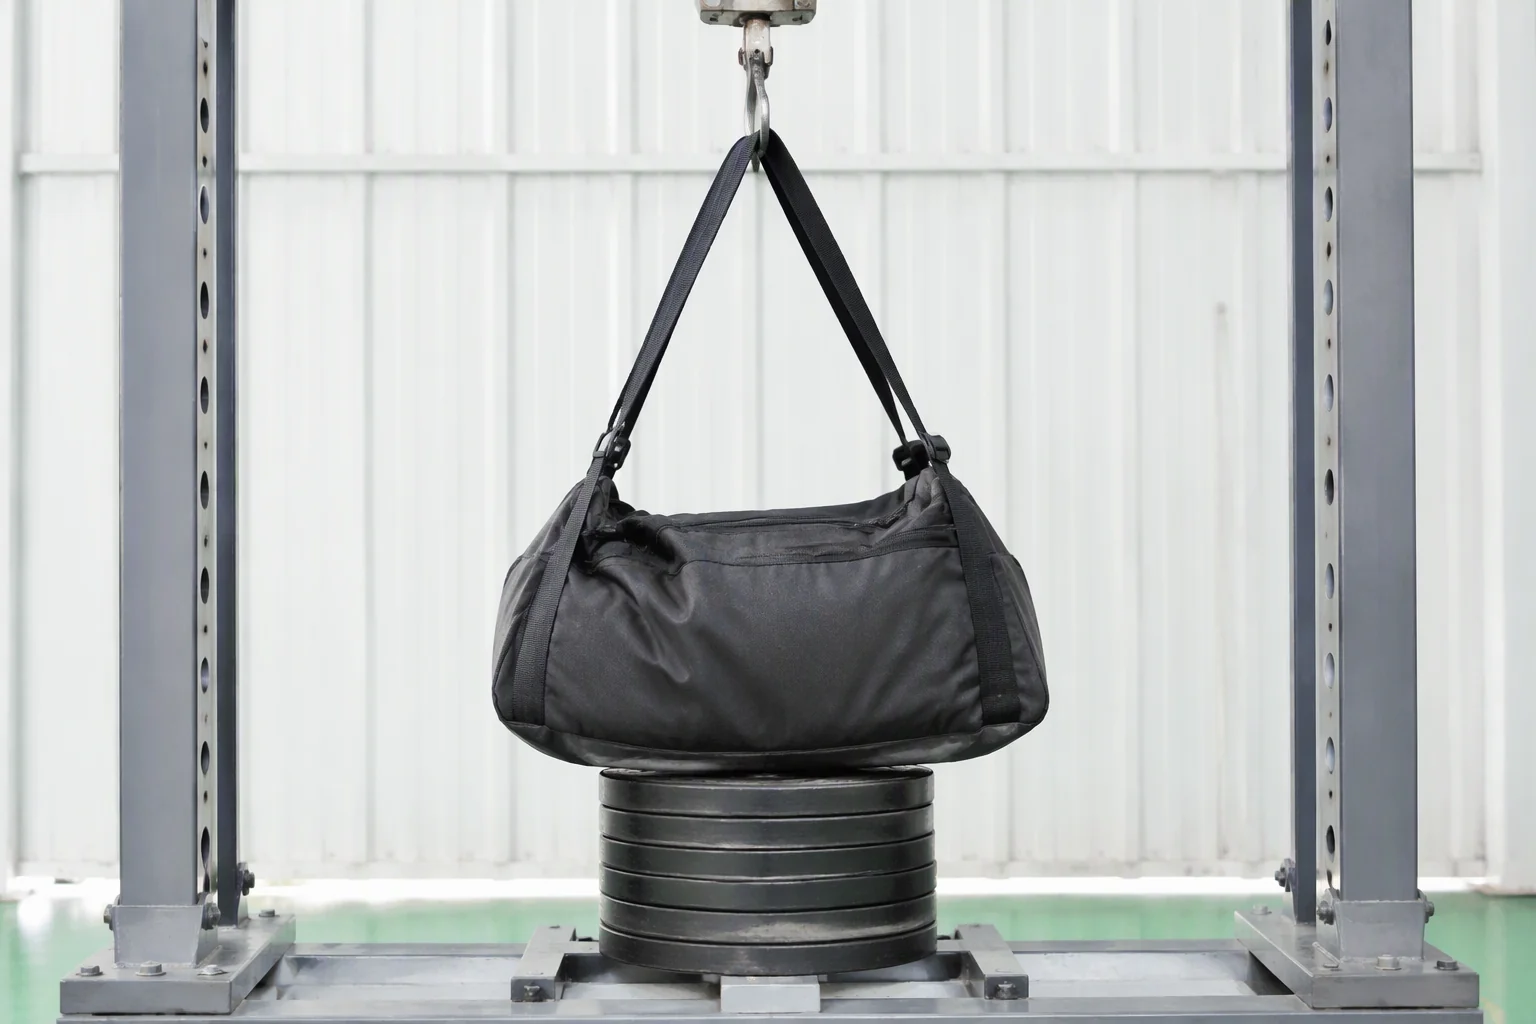
A static load test can be run with weights, a hook and a support. A pull test can be run with a spring gauge or a lever and known masses. Cycle testing can be done manually for a few hundred repetitions, which is sufficient to identify gross problems.
The essential discipline is consistency rather than sophistication. The same method, applied the same way, produces comparable results between suppliers and batches, which is what the test is actually for.
When a laboratory is worth the cost
Laboratory testing becomes worthwhile when a specification requires it, when a certification is being pursued, when a retailer demands documented results, or when a failure has occurred and the cause must be established precisely.
Third-party laboratories also provide the independence that makes results defensible in a dispute. For an internal design decision, an in-house test is usually sufficient; for a contractual disagreement, it is not.
| Method | Equipment | Suits |
|---|---|---|
| Static weighted hang | Weights, hook, frame | Carry point strength |
| Spring gauge pull | Gauge, clamp | Anchor and seam strength |
| Manual cycle test | Sample, timer | Zips and closures |
| Long-duration hang | Weights, support | Sustained load deformation |
| Drop test | Height marker, floor surface | Impact and contents protection |
| Laboratory test | Certified rigs | Specification and dispute use |
Test the production sample, not the prototype
A critical detail is which sample is tested. A hand-made prototype often has more reinforcement and closer attention than the production version, so a prototype can pass a test that the production construction would fail.
Test the pre-production sample built with production materials, production methods and the production pattern. That is the version whose results predict what customers will receive.
Recording Results and Using Them
A test that is not recorded cannot be referenced later, which is where most of its value is lost. The record should be simple enough to be completed consistently.
What the record should contain
A usable record identifies the product, the sample and the construction details, states the test method and load, describes the result including where failure occurred, and includes a photograph of the failure point.
The photograph matters more than the written description. When a failure recurs in a later batch, comparing photographs shows immediately whether it is the same issue or a new one.
Using results to specify production
The most valuable outcome of a load test is a written construction requirement. If a pull test shows that an unreinforced anchor fails at fifteen kilograms and a reinforced anchor holds at thirty, that finding becomes a specification: the reinforcement is required, not optional.
Specifications derived from tests are also easier to enforce, because they describe a construction rather than a performance level that the factory must interpret.
| Record field | Why it matters |
|---|---|
| Product and sample reference | Ties result to the approved construction |
| Construction details | Explains why the result occurred |
| Test method and load | Makes the result repeatable |
| Result and failure location | Drives the corrective action |
| Photograph of failure | Enables comparison across batches |
| Decision taken | Converts a result into a requirement |
Carrying results into future orders
Test results should follow the product into production. The construction requirement becomes part of the specification, and the failure photograph becomes part of the inspection reference so that the same weakness is checked on every subsequent batch.
This closes the loop between design and production. Without it, testing improves the sample and nothing else, and the same failure reappears in the next order.
FAQ
What is load testing and why does it matter for bags?
Load testing applies defined forces to a bag’s carry points, seams and closures to verify that the construction survives real use. It matters because the common failures — handle anchors pulling out, straps separating, zips splitting under load — are all reproducible in a simple pre-production test, and repairing them after delivery is far more expensive.
How much weight should a bag handle test use?
A practical working level is two to three times the expected contents weight. For a bag intended to carry five kilograms, test at ten to fifteen kilograms. The exact multiple matters less than agreeing a defensible figure before testing, so the result can be interpreted objectively rather than argued about afterwards.
Should I test handles together or one at a time?
Both, but the single-point test is the more revealing one. Users routinely carry a bag by one handle or one strap, which concentrates the entire load on one anchor. A construction that passes even loading can fail immediately on the first single-handle lift.
How many cycles should a zipper test involve?
Ideally, a count reflecting the product’s expected life: a main compartment zipper used several times a day over three years implies a substantial number. Where a full endurance test is impractical before production, a few hundred cycles still identifies gross problems such as a mismatched slider or a distorted curve.
Can I run load tests without a testing laboratory?
Yes. Weights, a hook, a support frame and a spring gauge cover most static and pull tests, and manual cycling handles closures. The essential discipline is consistency of method rather than sophistication of equipment, because comparability between batches is what makes the result useful.
Which sample should be tested — the prototype or the production sample?
Always the pre-production sample built with production materials, methods and patterns. Hand-made prototypes frequently carry extra reinforcement and closer attention, so they can pass a test that the actual production construction would fail. Testing the wrong sample gives false confidence.
What counts as a failure in a load test?
Define it precisely before testing: thread or panel rupture, hardware deformation, permanent elongation that does not recover, or loss of function in a closure. Permanent deformation deserves inclusion for bags, because a handle that stretches and stays stretched generates complaints even without breaking.
How long should a static load be held?
Long enough for the material to respond. A short hold may miss creep in PU leather and coated fabrics, which stretch gradually under sustained load. Leaving a loaded bag hanging for a day or two is inexpensive and catches deformation that brief tests consistently miss.
Do I need third-party laboratory testing?
Only in specific situations: when a specification or certification requires it, when a retailer demands documented results, or when a failure has occurred and the cause must be established precisely. For internal design decisions, a consistent in-house test is normally sufficient and far cheaper.
What is the most common cause of bag failure in use?
Insufficient reinforcement at the anchor point where a handle or strap meets the body. The handle itself is rarely the weakest element; the panel behind it usually is. A strong webbing handle stitched to an unreinforced panel simply tears the panel, which is why anchor reinforcement is the critical design decision.
How should test results be used after the order is placed?
They should become production requirements. A test showing that a reinforced anchor holds twice the load of an unreinforced one converts into a specification that the reinforcement is mandatory. The failure photograph should also be added to the inspection reference so the same weakness is checked on every later batch.
When is the best time to run load tests?
During sample approval, before the production line starts. At that point a design change costs only a revised sample, whereas the same change after the line has started means stopping production. Building the test into the sampling calendar rather than treating it as a separate step removes most schedule pressure.
Working with a PU leather bag manufacturer?
We manufacture PU leather bags in Guangzhou on OEM and ODM programmes, with load, pull and cycle testing built into sample approval and recorded as written construction requirements for production. Send your requirements to info@gionar.com, or review our custom bag manufacturing capabilities.